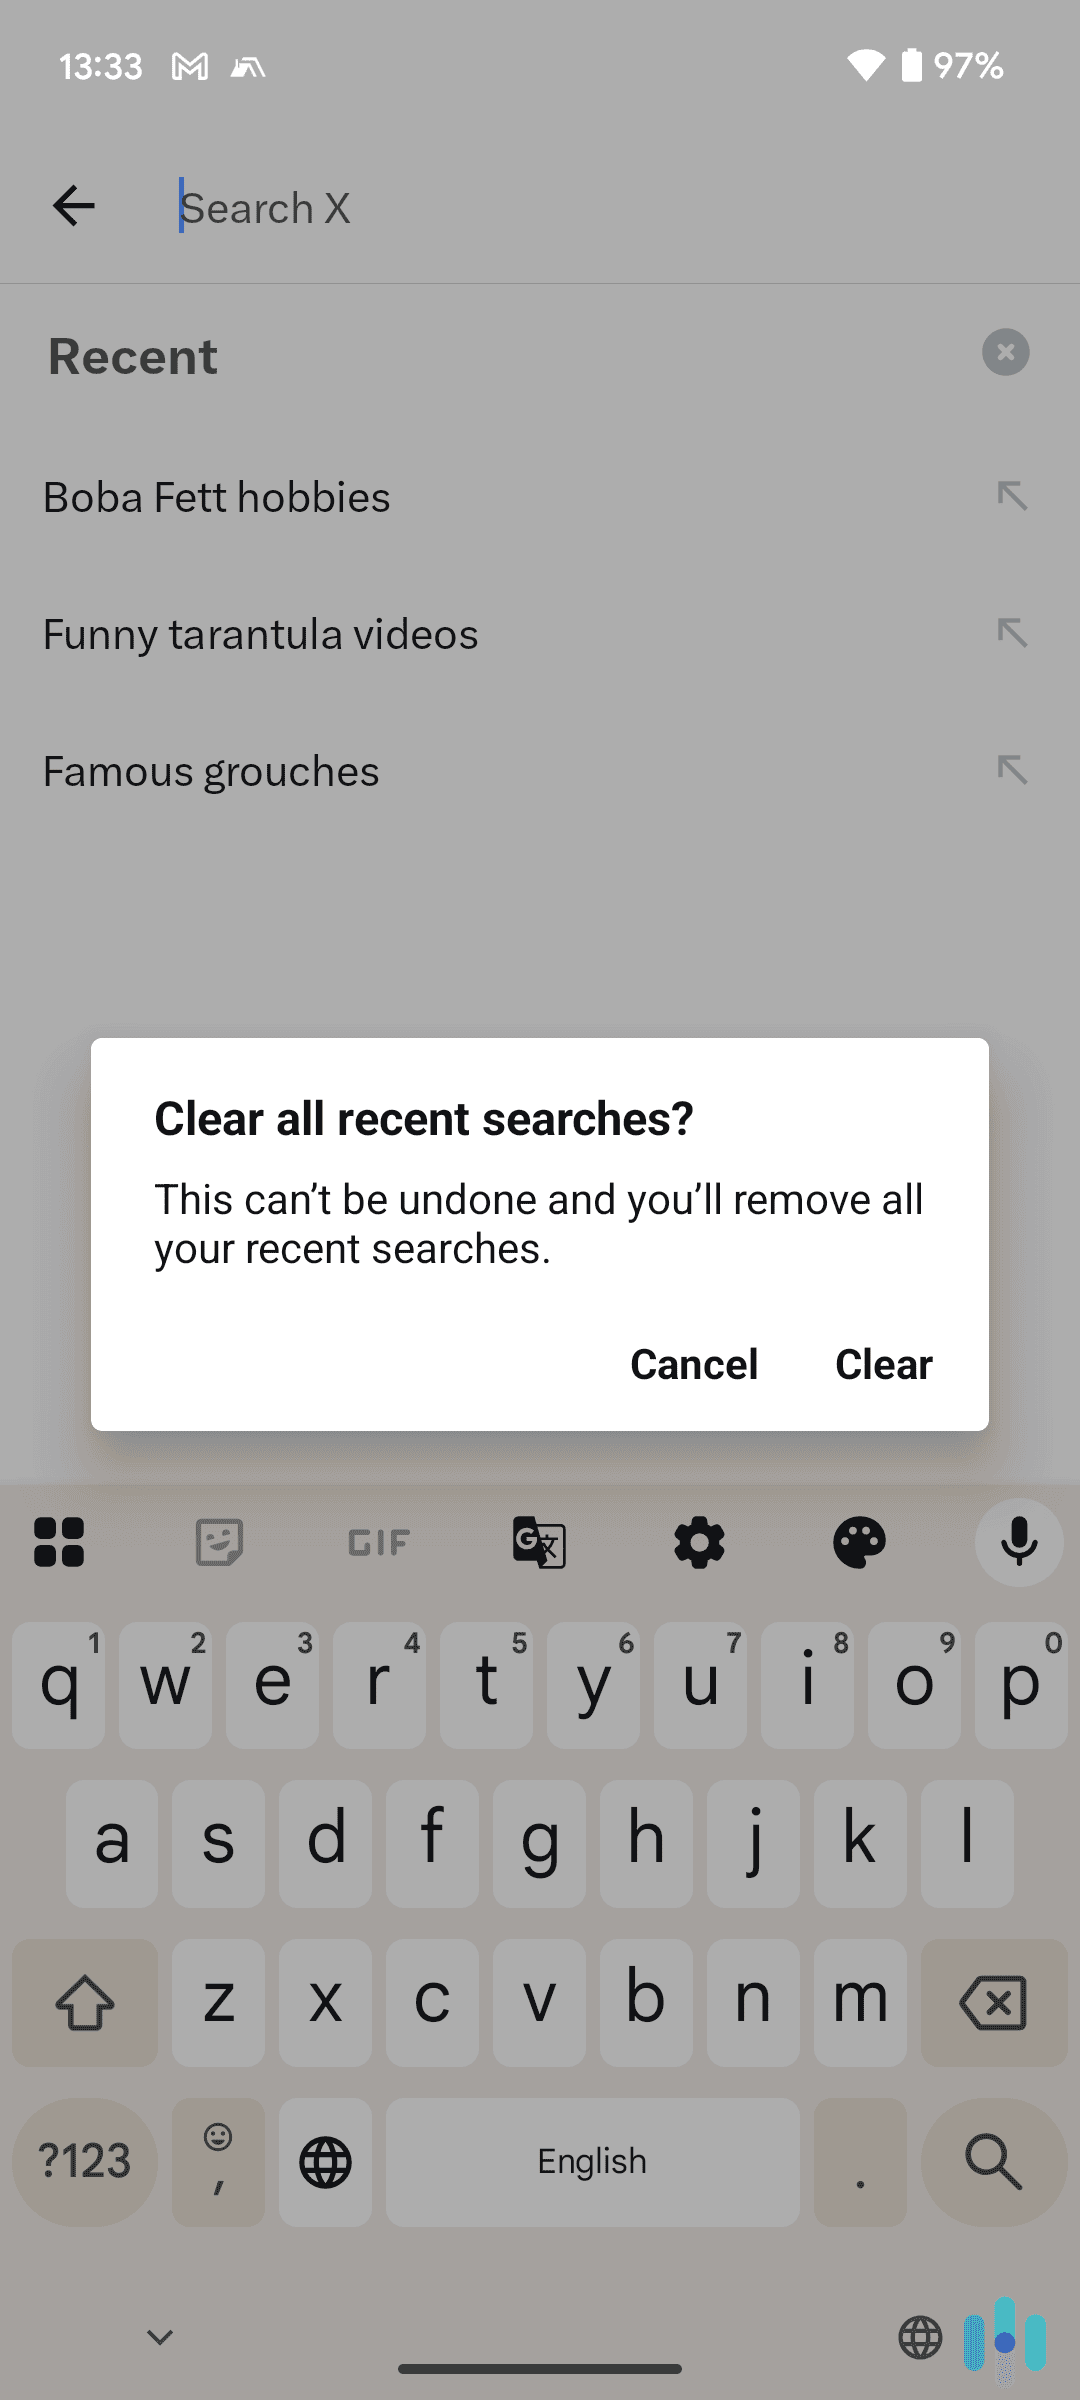


Search histories are useful for looking up websites you used a month ago, but your iPad browser cache can also be a hidden security risk. Along with websites you visited, your cache contains auto-filled login credentials and other personally identifiable information stored in cookies. In the wrong hands, that information could easily lead to identity theft.
In this digital security guide, we’re going to lead you through the fairly easy process of clearing your search history on your iPad on both Safari and Chrome browsers. We’ll also cover some additional privacy tweaks we recommend for iPad users. Let’s get right into it.
FYI: Hackers can go beyond simple thievery when it comes to search history caches. Using a technique called “cache poisoning,” they can inject malicious versions of the websites you visited directly into your search history, fooling you into visiting phishing sites.
How to Clear Your iPad Search History
We’re going to start with clearing search histories on Safari. If you use both Chrome and Safari browsers on your iPad, we recommend erasing your search histories from Chrome, too. More on that below.
>> Also: Clearing Your iPhone Search History
Safari
Method 1: Delete Search History But Keep Cookies
- Open the Safari app. Instead of going into your Settings, just tap open your Safari app.
- Press the Show Sidebar icon. Tapping the blue icon on the far left of the navigation bar will open up your sidebar. Your search history will appear there.
- Tap “Clear.” Tap the word “Clear” in red at the bottom right of the sidebar.
- Select your timeframe. You’ll have a few timeframe options (all history, today, today and yesterday, or last hour). Choose one and tap “Clear History.”

Pro Tip: If you’re taking the step to purge your search history, we recommend going all the way and deleting all of it.
Method 2: Delete Search History and Cookies
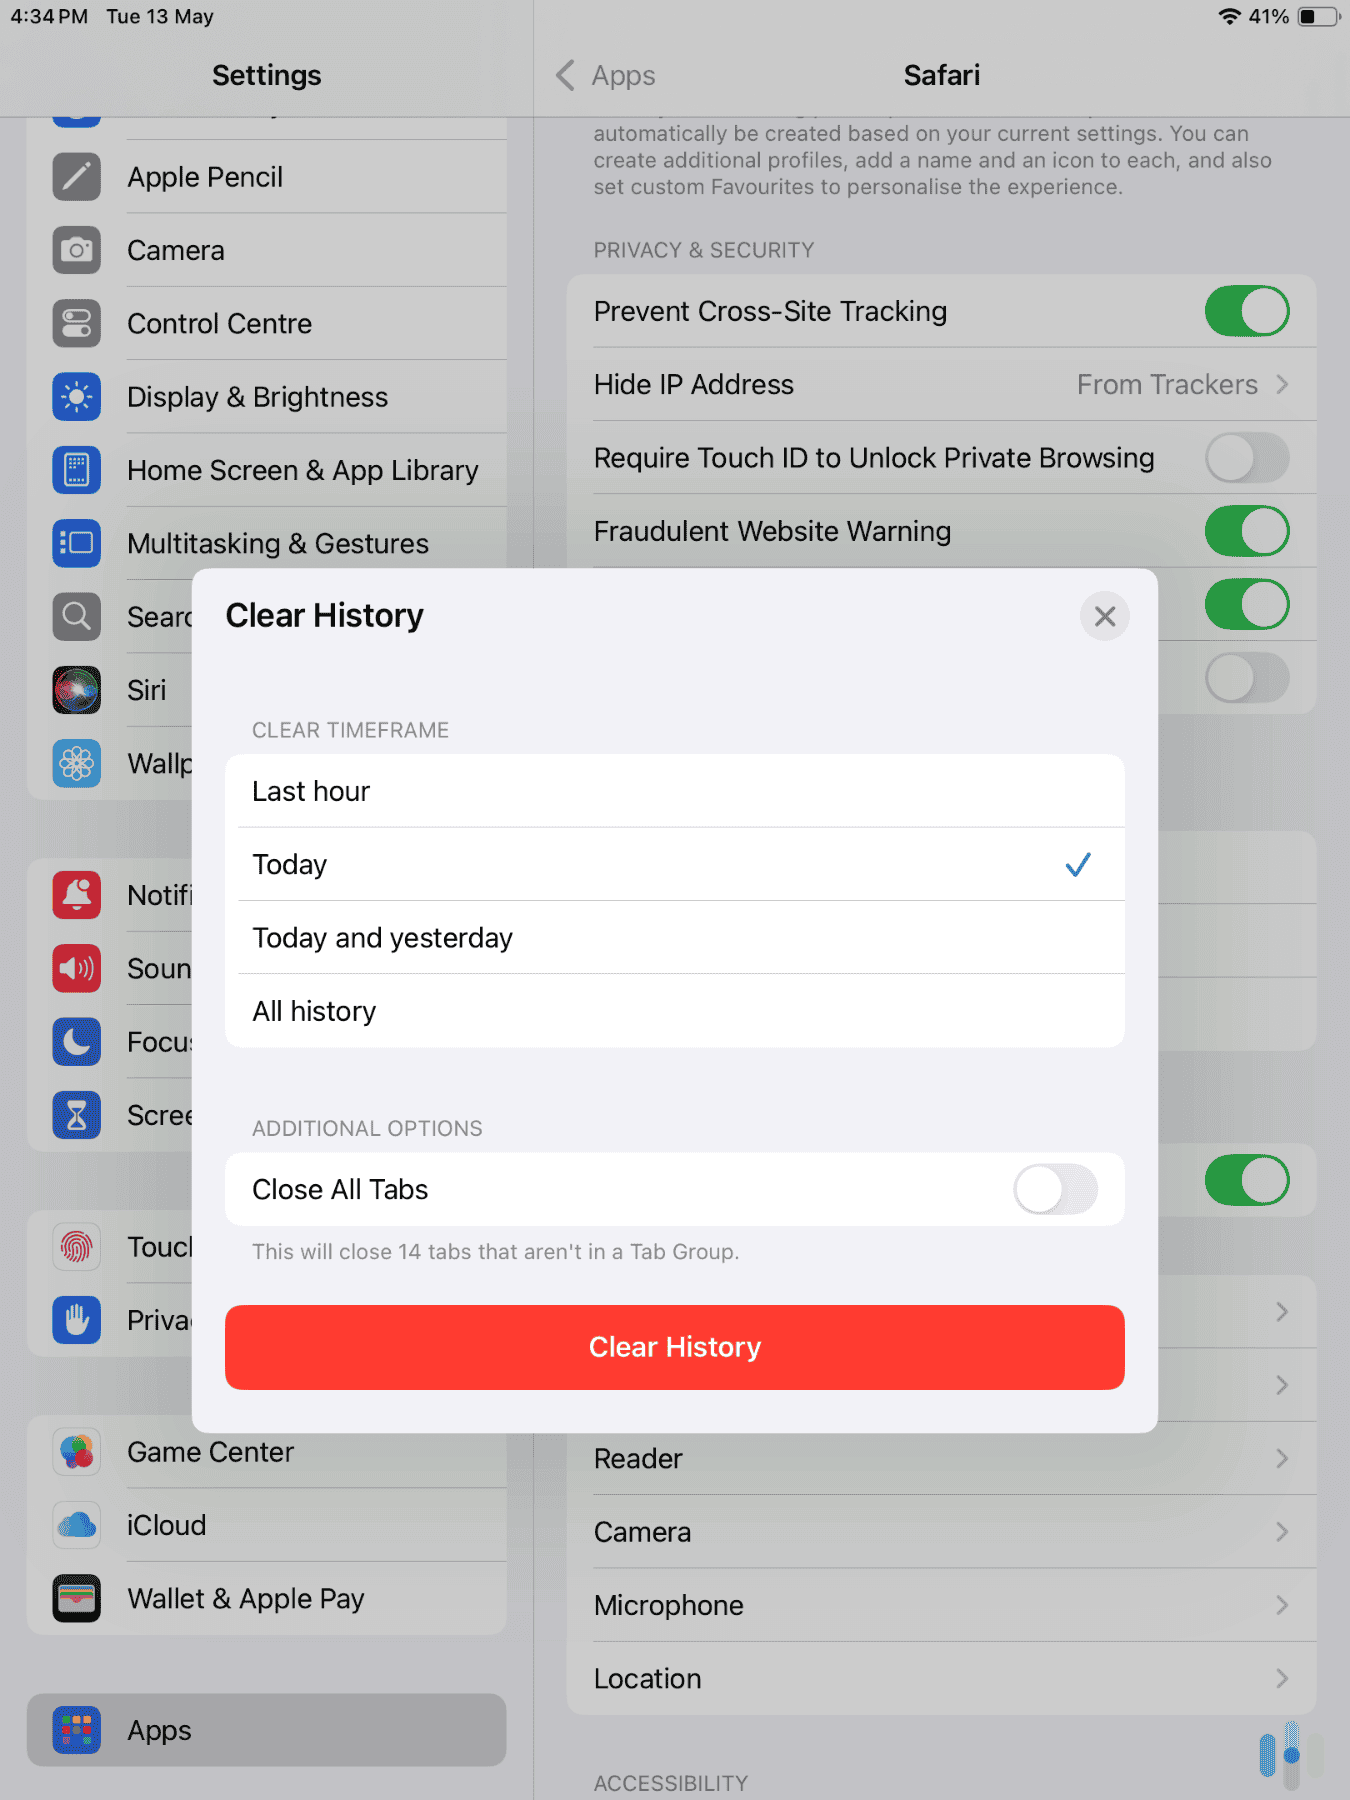
- Open Settings > Apps > Safari. Open Settings, find Apps, then scroll down alphabetically to Safari.
- Scroll down to the History and Website Data tab. Tap “Clear History and Website Data” under the History and Website Data tab. Select the timeframe and tap the red “Clear History” button.

Chrome
Chrome makes it easier to clear your cache because you can delete everything in one place. Follow these steps to clear your search history from Chrome.
1. Open the Chrome app on your iPad and tap the More menu. The More menu is the three dots in the top right corner of the address bar. Tap it and a second menu will open up.
2. Tap “Delete browsing data.” Delete browsing data is the last option in the menu. Tap it.

3. Select a time range. We recommend “all time” if you’re purging your cache for security.

4. Choose the items you want to delete and tap Confirm. This is an important step. For maximum security, we recommend deleting browsing history, cookies and site data, cached images and files, and auto-fill data.

5. Wait for Chrome to restart. After Chrome dumps your data, you’ll start fresh.
>> Also: Clearing Your Search History on Android
For Firefox Users: To delete your Firefox data, open Firefox and tap Hamburger Menu > History > Trash. Choose a time range and you’re done. For an item-by-item cleanse, open up your Firefox Settings. Under Data Management, toggle off the items you want to keep, then tap “Clear Private Data.”
How to Clear Siri Search History on Your iPad
If your iPad is unlocked and a thief or hacker gets ahold of it, they can use Siri to access your messages, contacts, and plenty of other sensitive information. So the first thing you want to do is go into your Settings, find Siri, and toggle off “Allow Siri When Locked.” Then follow these steps to erase your Siri search history.
1. Settings > Siri > Siri Requests > Siri & Dictation History. If you toggled off “Allow Siri When Locked,” you’re already in your Siri Request Settings. Find “Siri & Dictation History” and tap it.

2. Tap Delete Siri & Dictation History. After you tap delete, Apple will ask you once more if you want to do this. Tap delete again.

3. Tap “OK” on the confirmation dialogue box. As Apple points out in its fine print, this will only delete the Siri transcripts on your device, not the ones on Apple’s servers. It’s not ideal, but at least your search history won’t be available to fraudsters this way.

FYI: Apple clearly states in its Siri data privacy statement that it stores our Siri transcripts on its servers and may extract anonymized data from them, including contacts, location, the music and podcasts we listen to, the apps we use, device information, and more.
Deleting Bookmarks and Reading Lists in Safari
Bookmarks have traditionally been fertile ground for hackers, who harvest them for social engineering attacks. A criminal notices you’ve bookmarked your bank’s website, for instance, then crafts a convincing phishing text from your bank. To delete your Safari bookmarks and/or items in your Reading List, follow these steps.
- Press the Show Sidebar icon. Press the blue Show Sidebar icon on the top left of the navigation bar.
- Tap Bookmarks > Favorites. You should see a vertical list of your bookmarks.
- Long tap on the websites you want to delete. Long tapping a website will bring up a second menu. Tap “delete” at the very bottom.

FYI: Fortunately, Apple has had end-to-end encryption for Safari bookmarks since 2021, or iOS 15. However, this requires you store your bookmarks in iCloud and toggle on Advanced Data Protection, which we recommend in any case. Activating Advanced Data Protection in our iPad’s iCloud settings

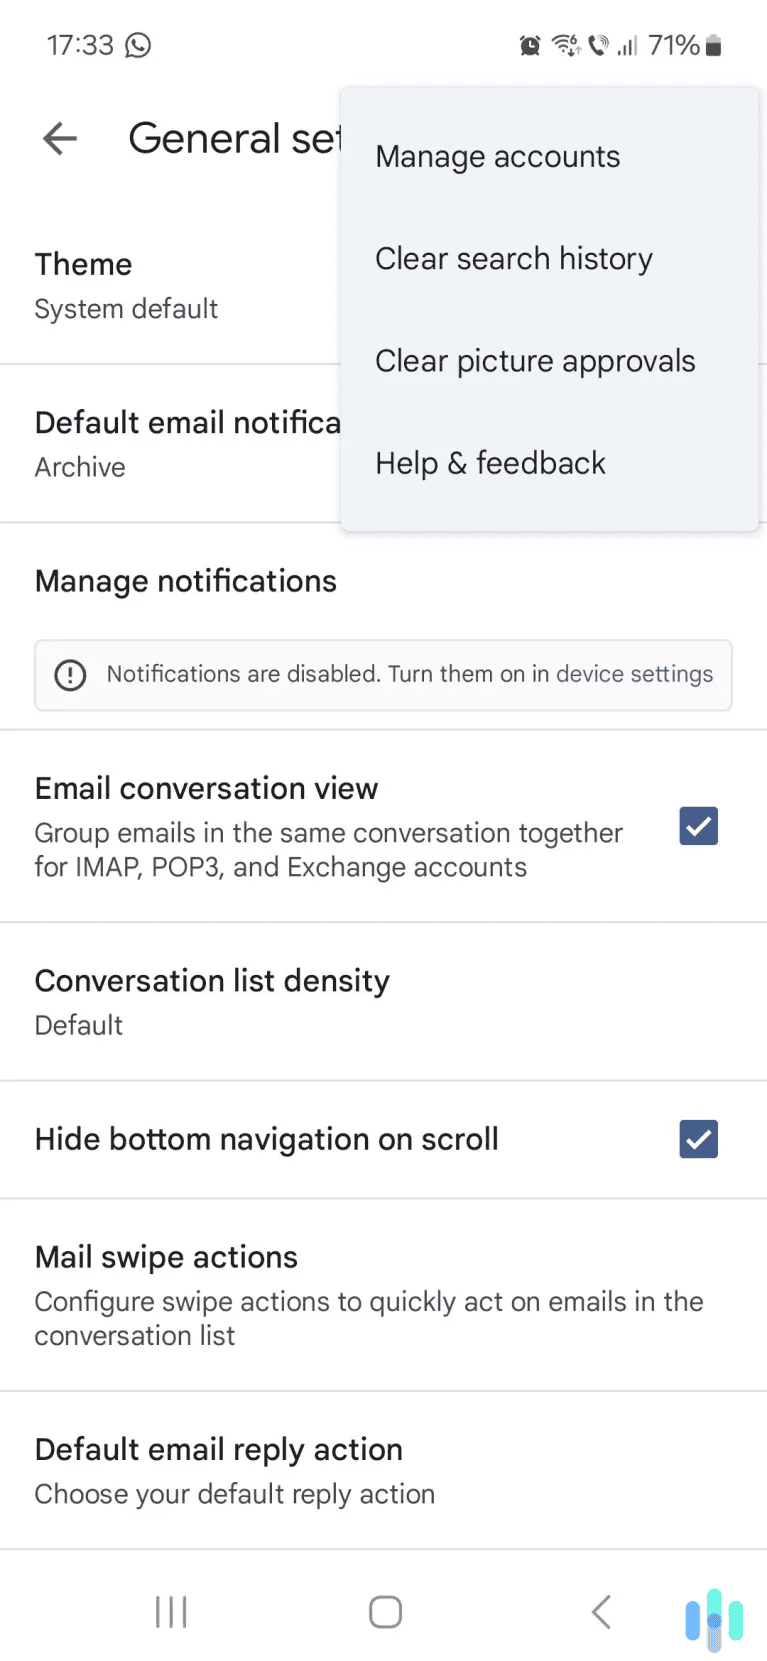
Deleting Google Activity
Google collects heaps of data from you across its many services, including Google services you use on your iPad. They share a lot of it with marketing networks and data brokers. So deleting your personal information from Google is a win for both your digital security and internet privacy. Here’s how to do it.
>> Learn More: Complete Guide to Data Removal
- Visit Google’s My Activity website. The information you’re about to delete is on Google’s servers, not on your device, so you’ll need to head over to myactivity.google.com and sign in to your Google account.
- Tap “Web & App Activity.” This is the first tab on the left.
- Find “Manage all Web & App Activity.” You’ll find the link in blue at the bottom of the page. Tap it.

- Tap Delete. When you tap delete a menu will open up. Select a time range (All time is the best) and confirm. You’re done.
Extra Security Tip: While you’re on the My Activity website, we also recommend enabling Google’s Auto-delete feature. This will delete your personal information from Google automatically at intervals so you don’t have to do it manually.

Additional Privacy Tweaks for iPads
Your iPad has a few more useful privacy features hidden within your Settings. The following are the most critical for your online privacy.
General Privacy Tweaks
1. Settings > Privacy & Security > Apple Advertising. If you don’t want Apple to use your search history to serve you ads, we recommend disabling Personalized Ads.
>> Also: The Data Big Tech Has Collected from You
2. Review your permissions. While you’re in Privacy & Security, review your permissions. If you notice a strange app that, say, has access to your microphone, toggle it off.
Safari
Open Apps > Safari > Privacy & Security. Toggle on the following:
- Prevent Cross-Site Tracking
- Hide IP Address from Trackers
- Fraudulent Website Warning
- Not Secure Connection Warning

FYI: Safari’s “Not Secure Connection Warning” alerts you if you’re about to connect to one of the millions of legacy HTTP websites floating around the web. These websites aren’t encrypted and so criminals tend to exploit them.
Chrome
As you might expect, Chrome allows less in-app privacy customization than Safari. Still, there are a few tweaks you should make.
Inside your iPad Settings
Apps > Chrome. Make sure “Allow Cross-Website Tracking” is toggled off.
>> Related: A Guide to Clearing Your Gmail Search History
Inside the Chrome app
1. More menu > Settings. Tap the More menu to the right of the address bar. A menu will open up. Scroll to the right through the icons list until you get to Settings.
2. Privacy and Security > Always use secure connections. In the Privacy and security tab, toggle on Chrome’s HTTP-only mode.

3. Safety Check. While you’re there, perform a safety check to see if any of your passwords have been compromised in a data breach and if you have the latest version of Chrome installed.
>> Test Your Passwords! Password Strength Test
Pro Tip: When we ran our Safety check, Google gave us the option to ramp up our browsing protection from Standard to Enhanced AI-powered malware detection. We toggled Enhanced protection on and recommend you do the same.

Why You Should Clear Your iPad Search History
Your iPad’s search history is one link in a chain of data that’s freely available to profiteers and criminals unless you take steps to remove it. Clearing your search history cache from time to time — or better yet, browsing in Private Mode or Incognito (see below) — will:
- Stop scammers from using your search history to engineer personalized attacks. The example we used above was a banking bookmark. But it could be an IRS search (tax fraud) or a health search (medical fraud), which are two of the most common and dangerous online scams circulating today.
- Prevent data brokers like your ISP from building detailed profiles based on your browsing activity. As the FTC revealed in 2021, ISPs regularly use your sensitive details to target ads for third parties.
- Make it harder for hackers to harvest personal information from your cache. This goes for search histories as well as cookies. For example, if a session cookie that keeps you logged into a site isn’t secure, a criminal can hijack it and log in as you.
Security Tip: Clearing your search history doesn’t mean cyber criminals and other Peeping Toms can’t see the sites you visit and attack you even if the websites you access are using HTTPS. The only reliable way to keep your browsing truly anonymous and safe is by using a virtual private network, or VPN.
>> Learn More: The Best VPNs of 2026
Using Private Mode and Incognito
Browsing privately in Safari’s Private Mode or Chrome’s Incognito won’t hide your searches from data snoops like your ISP. As mentioned above, you’ll need a VPN for that. But when you surf privately, your browser doesn’t store your search history, cookies, or any website data that may give bad actors an edge. So we recommend it for added privacy.
Safari
Open Safari and tap on the blue Show Sidebar icon on the top left of the navigation menu. When the sidebar opens, tap Private. A private browsing window will open.

Chrome
Open Chrome and tap on the More menu (the three dots) on the right. Then tap “New Incognito tab.”

Recap
Having your search history handy is convenient if you want to revisit a website whose name you can’t quite recall. The same goes for auto-filled passwords and website cookies. But keeping all that info hanging around on your device and in the cloud can be dangerous. Because despite the great advances in digital security we’ve seen in the past few years, if we don’t take steps to hide our tracks online, we’re still vulnerable to snoops and criminals.
To make it harder for bad actors, clear your search history regularly, along with any other data your browsers have been collecting. Toggle on all available privacy and security features your iPad and browsers give you. Browse in Private Mode or Incognito. And finally — and most importantly — don’t go online without a VPN encrypting your web traffic and masking your IP address.
FAQs
-
Does clearing my browser’s search history on my iPad also delete my cookies?
No, it doesn’t. In Safari, Chrome, and Firefox, there are options for deleting your entire cache or deleting separate items like your search history. See instructions above for both.
-
How can I delete all my stored website data on my iPad?
In Safari, you need to access Safari through your Settings panel. For Chrome and Firefox, you can delete your entire cache inside the apps themselves. We’ve provided detailed instructions above.
-
Should I delete my browser search history on my iPad?
Yes, we recommend regularly cleaning your search history. It’s one less breadcrumb for hackers to follow.
-
Is my search history visible to my internet service provider (ISP)?
Yes, it is. The only way to hide your search history from your ISP is to use a VPN.
-
Is private browsing safer?
Yes, it is, because when you browse privately, your browser isn’t storing any website data, including search history and cookies. But private browsing doesn’t mean anonymous browsing. The only way to browse anonymously is with a VPN.