Best VPNs for Windows in 2026 — Intuitive & Feature-Rich Apps
Our top pick, NordVPN, has the most feature-rich app that can protect you from malware-infected downloads, scan the dark web for data leaks, and block ads and ad trackers.
 &
&
 Last Updated on Jun 03, 2026
- Has tons of extras, including double VPN servers and dark web monitoring
- Can protect your device from malicious downloads and app vulnerabilities
- Has a very intuitive Windows app
- Works with tons of streaming sites like Netflix, BBC iPlayer, and Disney+
- Has an IP-rotating feature that makes it hard for sites to block the VPN
- Is available for download via the Microsoft Store
- Has an audited no-logs policy, and an open-source Windows app
- “Secure Core” servers offer enhanced privacy
- Has servers in 117 countries, and works with over 90 streaming sites
the security.brief
NordVPN is the best Windows VPN for 2026, offering features like malware protection, dark web monitoring, and ad-blocking. Surfshark excels in streaming.
There are plenty of good reasons to use a VPN on Windows. It secures your web traffic and prevents bandwidth throttling, and also improves your streaming, torrenting, and gaming.
Most VPNs have Windows apps, but that doesn’t mean they all provide good value. Some are buggy or difficult to use; others have slow speeds or lack important security and privacy features. So we rounded up the best VPNs in 2026 and tested their Windows apps to see which ones provide the best value. Our top pick is NordVPN because its Windows app is extremely feature-rich, but we also enjoyed using Surfshark while streaming and Private Internet Access while downloading torrents.

The Best Windows VPNs in 2026 Ranked
- NordVPN - Most Feature-Rich Windows VPN
- Surfshark - Best Windows VPN for Streaming
- Proton VPN - Best Windows VPN for Privacy
- Private Internet Access - Best for Torrenting on Windows
- ExpressVPN - Great Windows VPN for Beginners
- IPVanish - Good Windows VPN with Fast Speeds
The Best VPNs for Windows Compared
| System |
NordVPN
|
Surfshark
|
Proton VPN
|
Private Internet Access
|
ExpressVPN
|
IPVanish
|
|---|---|---|---|---|---|---|
| Ranking | 1st | 2nd | 3rd | 4th | 5th | 6th |
| Ratings | 9.7/10 | 9.5/10 | 9.3/10 | 9.4/10 | 9.1/10 | 9.3/10 |
| Encryption | 256-bit AES | 256-bit AES | 256-bit AES | 128-bit to 256-bit AES | 256-bit AES | 256-bit AES |
| VPN protocol |
|
|
|
|
|
|
| Number of Countries | 118 | 100 | 117 | 91 | 105 | 106 |
| Extra features |
|
|
|
|
|
|
| Microsoft Store app | No | Yes | No | No | Yes | No |
| Starting Price | $3.39/month | $2.19/month | $4.49/month | $2.19/month | $4.99/month | $2.19/month |
| Money-Back Guarantee | 30 days | 30 days | 30 days (prorated) | 30 days | 30 days | 30 days (long-term plans only) |
| Read Review | NordVPN Review | Surfshark Review | Proton VPN Review | Private Internet Access Review | ExpressVPN Review | IPVanish Review |
Deep-Dive Into The Best Windows VPNs
-
1. NordVPN - Most Feature-Rich Windows VPN
 Get NordVPN Links to NordVPN
Product Specs
Server locations 137 countries countries Average Speed Loss 6% download & 4% upload Apps Windows, MacOS, Linux, Android, iOS, Chrome, Firefox, Edge, Android TV, tvOS Best Monthly Rate $3.09/mo with a 2-year plan Money-Back Guarantee 30 days full refund
Who NordVPN Is Good for

Out of all the Windows VPNs we tested, we found NordVPN to be the most feature-rich one. We recommend NordVPN to Windows users who want a really feature-rich VPN. The NordVPN Windows app provides access to tons of great extras, including split-tunneling, dark web monitoring, protection against malicious downloads, double VPN servers, and more.
What We Like
- Has an extremely feature-rich and intuitive Windows app
- Protects against malware-infected downloads
- Has really good torrenting support
- Provides access to servers in 118 countries
What We Don’t Like
- Not the most affordable VPN out there
- The pricing changes after the initial term
- Threat Protection Pro isn’t included with the cheapest subscription
Windows App User Experience
NordVPN’s Windows app works on Windows 10 and 11, but we’ve confirmed that you can also download it on older devices running Windows 7 and 8.1. There’s also a Windows app version for Windows ARM devices. We also like how the VPN allows 10 simultaneous connections, which is on the higher end of the industry average of 5-10 connections (but not unlimited, like Surfshark and Private Internet Access).
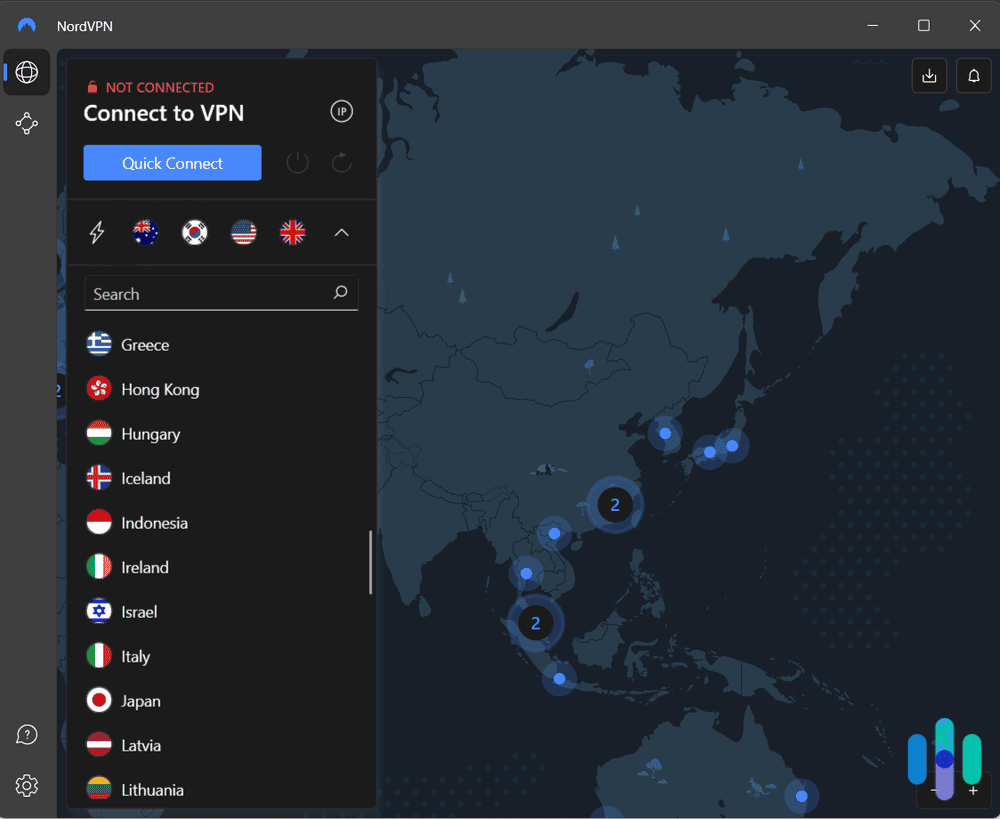
We found the VPN’s Windows app extremely simple to navigate and use. We especially like how there’s a digital map that you can use to quickly find and connect to a specific server location. There’s also a search field for instant access to any server. On average, it never took us more than 10 seconds to find and connect to one of NordVPN’s servers.
Server Network, Streaming & Torrenting
NordVPN has one of the largest server networks — we counted a total of 118 countries in its Windows app, which is really impressive. This makes it possible for almost anyone to find and connect to a nearby server to get the fastest VPN speeds.
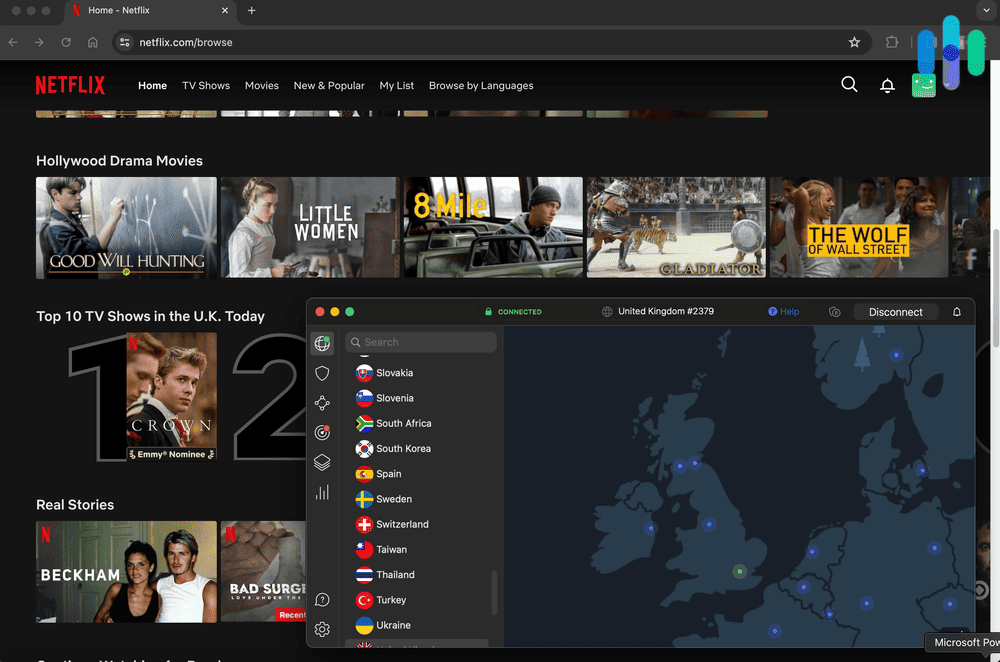
We also think NordVPN offers excellent streaming support. We tested it with Netflix, Amazon Prime Video, BBC iPlayer, Disney+, and Crunchyroll, and it worked with those services with very few issues.
NordVPN is also pretty good for torrenting. We found that it supports P2P downloads on servers in more than 110 countries. Plus, it supports SOCKS5 proxy connections, which means you can configure one of NordVPN’s SOCKS5 servers in your P2P client. If you use a SOCKS5 proxy, it will hide your IP address but won’t encrypt your traffic. That means it will provide faster download speeds than a VPN connection while still giving you some privacy.
FYI: The size of NordVPN’s server network makes it a good option for changing your Netflix location. We used NordVPN to get a U.K. IP address, a Spanish IP address, and a Canadian IP address, which we then used to access Netflix. The servers all successfully accessed the British, Spanish, and Canadian Netflix libraries.
Extra Features
When we used NordVPN, we were really impressed with its Threat Protection Pro features. NordVPN’s Windows app is extremely feature-rich. Our favorite one is Threat Protection Pro. In addition to blocking ads and ad trackers, like most VPNs do, it protects your device from malware-infected downloads (similar to an antivirus). The tool can also scan your Windows device for outdated software that could put your system at risk. What’s more, it protects you from phishing attacks by blocking phishing domains and detecting fake shopping sites. We tested Threat Protection Pro by trying to download the EICAR malware test file, and the feature immediately blocked it.
Windows users also get access to split-tunneling, which lets you choose which apps use or don’t use the VPN connection. We used split-tunneling to prevent traffic from our P2P client from connecting through NordVPN, which increased our torrenting speeds. Another feature that caught our attention is Coveron. It’s one of the best identity theft protection services we’ve tested. Coveron offers up to $1 million in identity theft recovery. This service can also search the dark web for your name, email, and credit/debit card numbers.
Pro Tip: NordVPN is also a really good VPN for gamers, mainly thanks to its Meshnet feature, which is available on the Windows app. This feature lets you set up private servers for multiplayer games (like Minecraft, Roblox, or Team Fortress 2) using NordVPN, so your friends can securely connect to your server.
Pricing
NordVPN has four tier-based subscriptions: Basic, Plus, Complete, and Prime. The Basic subscription starts at $3.39 per month, but it only provides access to Threat Protection, a more limited version of Threat Protection Pro. We recommend getting the Plus subscription (it’s the one we got) to get all VPN features, including Threat Protection Pro. The Plus subscription also adds NordPass, which is one of the best password managers for Windows in 2026.
NordVPN Subscription 1-Month Plan 1-Year Plan 2-Year Plan Basic $12.99/month $4.99/month $3.39/month Plus $13.99/month $5.99/month $4.39/month Complete $14.99/month $6.99/month $5.39/month Prime $17.99/month $9.99/month $8.39/month The Complete and Prime subscriptions add access to more security services. Complete adds encrypted cloud storage, and Prime adds Coveron. Also, NordVPN backs all of its plans with a 30-day money-back guarantee.
>> Learn More: How Much Does NordVPN Cost?
-
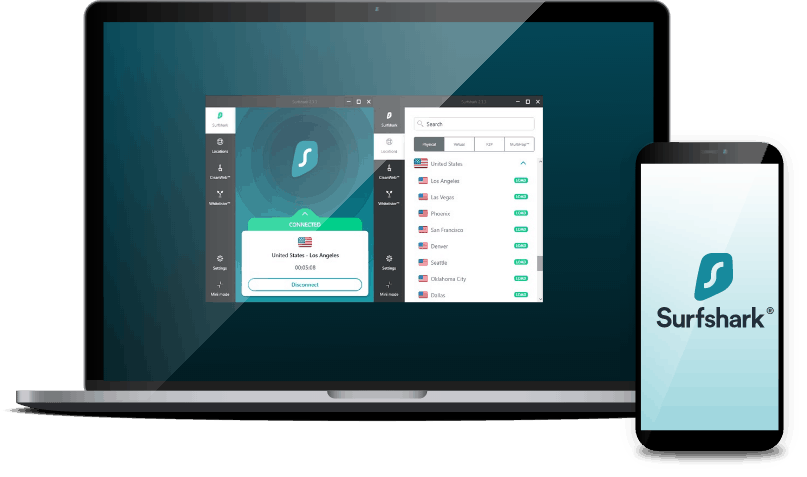
2. Surfshark - Best Windows VPN for Streaming
 Get Surfshark VPN Links to Surfshark.com
Product Specs
Server locations 100 countries countries Average Speed Loss 8% download & 50% upload Apps Windows, MacOS, Linux, Android, iOS, Chrome, Firefox, Edge, tvOS, Android TV, Fire TV Best Monthly Rate $1.78/mo with a 2-year plan Money-Back Guarantee 30 days full refund
Who Surfshark Is Good for
We tested Surfshark with over 20 streaming sites, and it was always able to access them without any issues. We think Surfshark is a good fit for anyone that’s mainly interested in streaming. That’s because the VPN is compatible with tons of popular streaming services. Plus, it provides pretty fast speeds that can accommodate 4K streaming if your internet is fast enough.
What We Like
- Works with all popular streaming services
- Can access over 20 Netflix libraries
- Protects your privacy by generating fake names and emails
- Allows unlimited simultaneous connections
What We Don’t Like
- The monthly plan is pretty expensive
- Doesn’t automatically block IPv6 traffic to prevent leaks
- Lacks port forwarding and SOCKS5 support for torrenting
Windows App User Experience
We were able to quickly install Surfshark on our Windows 10 PC since we found it on the Microsoft Store. You can download and install Surfshark’s app on Windows 10 and 11, as well as Windows 7, 8, and 8.1. The VPN also has a version of the Windows app for ARM64 devices. You can get the app from the VPN’s website, but we also found it on the Microsoft Store, which we think is pretty convenient. We also like how Surfshark allows unlimited simultaneous connections, unlike NordVPN, which has a 10-device limit. This means you can use it on as many Windows devices as you want.
We tested Surfshark’s app on Windows 10 and 11. Overall, we found it extremely easy to use the VPN to change our location on our PCs. We especially like how there’s a quick-connect feature that automatically connects you to the fastest server with one click. Normally, all top VPNs have this, but we really like how Surfshark lets you customize the feature to connect you to any server location you want.
Server Network, Streaming & Torrenting
Surfshark provides access to servers in 100 countries, which is great, but not as many as NordVPN’s 118 countries. Surfshark also performed pretty well in our speed tests. It only slowed down our download speeds by about 7.76%. Our upload speeds slowed down by almost half, but we still had overall fast browsing, streaming, and gaming speeds when we used Surfshark on our Windows devices. If you do upload-heavy tasks, though, we’d recommend NordVPN instead, because it slowed our upload speed down by less than 5%.
We think Surfshark is one of the best VPNs for streaming in 2026. In our tests, it worked with sites like Netflix, Disney+, Max, Hulu, and ESPN+ without much problem. We also think it’s one of the best Netflix VPNs on the market, since it’s compatible with over 20 Netflix libraries. We tested it with Netflix Japan, Australia, Canada,the U.S., and the U.K., and it was able to consistently access those libraries. Windows users also get access to a feature that regularly changes your VPN IP without dropping your connection. Enabling rotating IP will make it harder for streaming sites to block your VPN connection.
Surfshark also has great torrenting support, as it allows P2P downloads on all of its servers. While that’s great, we still think Private Internet Access is better for torrenting on Windows, since it provides access to extra P2P-related features that boost your download speeds.
>> Read More: The Best VPNs for Netflix in 2026
Extra Features
Although not as feature-rich as NordVPN, we like how Surfshark provides access to split-tunneling (called Bypass) and how it also has an ad-blocker called CleanWeb. We tested CleanWeb by visiting a few ad-heavy websites, and it got rid of over 90% of ads, which is really good. That said, it’s still not as good as NordVPN’s Threat Protection Pro feature, since it can’t block malware-infected downloads or detect app vulnerabilities — unless you sign up for the more expensive Surfshark One plan with antivirus software.
The Windows app also provides access to Alternative ID. This is a feature that helps you keep your personal data hidden by generating alternative identities and emails. For example, we use Alternative ID to generate an alias (name, birth date, and address) and email address that we use to sign up on websites we don’t trust with our data. We think Alternative ID goes hand in hand with a VPN, since it protects personal information in a way that VPNs simply can’t.
>> Read More: What Is Personally Identifiable Information (PII)?
Pricing
Surfshark has three tier-based subscriptions: Surfshark Starter, Surfshark One, and Surfshark One+. For this guide, we got the Surfshark Starter subscription, and that’s the one we actually recommend, since it comes with all VPN features as well as the Alternative ID service. The subscription is pretty expensive if you pay month-to-month, but it becomes significantly cheaper if you opt for the longest plan (the price starts at $2.19 per month). Plus, Surfshark backs all purchases with a 30-day refund.
Surfshark Starter Subscription Costs 1-Month Plan $15.45/month 1-Year Plan $3.19/month 2-Year Plan $2.19/month The other subscriptions provide access to additional security services. The Surfshark One subscription adds an antivirus (Surfshark Antivirus), and the Surfshark One+ subscription adds a data removal service (Incogni).
>> Find Out More: How Much Does Surfshark Cost in 2026?
-
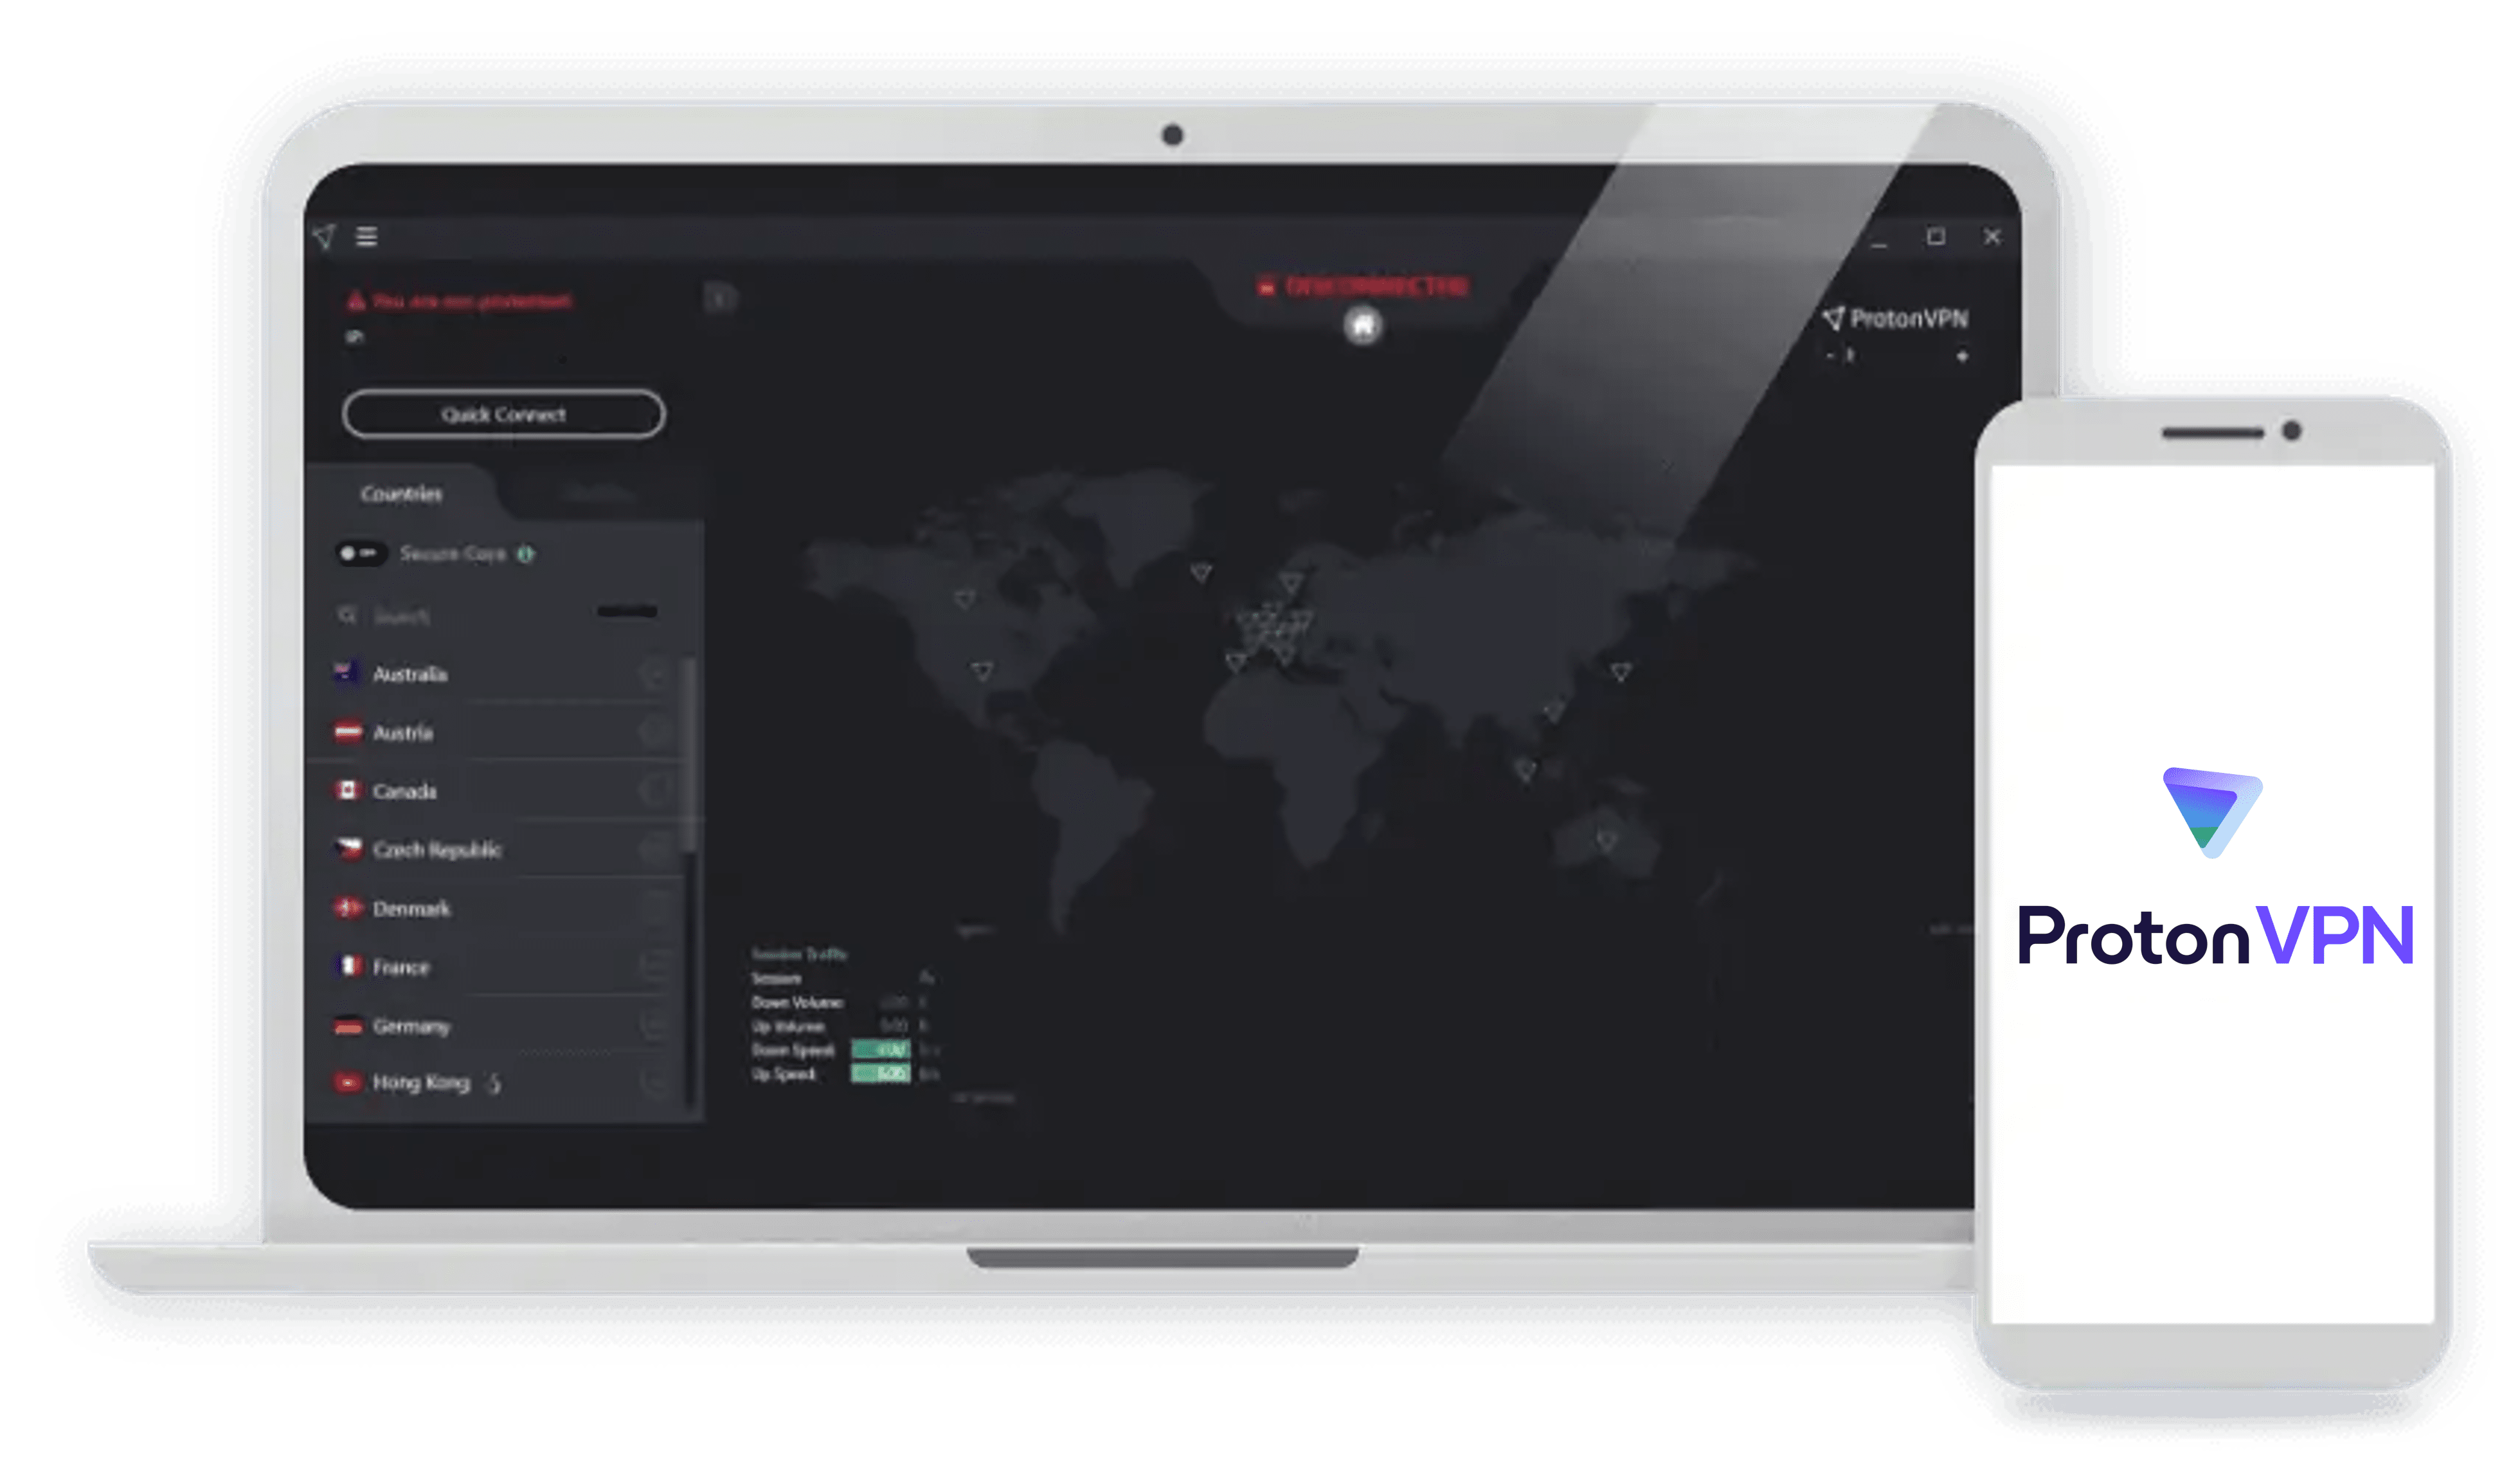
3. Proton VPN - Best Windows VPN for Privacy
 View Plans Links to Proton VPN
Product Specs
Server locations 129 countries countries Average Speed Loss 8% download & 4% upload Apps Windows, MacOS, Linux, Android, iOS, Chrome, Firefox, Android TV, tvOS, Firestick Best Monthly Rate $2.99/mo with a 2-year plan Money-Back Guarantee 30 days

Proton VPN’s Windows app provides enhanced privacy via Secure Core servers. Proton VPN is the best VPN for Windows users who prioritize privacy. It has an independently-audited no-logs policy, and its Windows app is open-source (and audited). It also has “Secure Core” servers that route your data through an additional VPN server located in a privacy-friendly country, like Switzerland or Iceland.
What We Like
- Offers high-end privacy via its “Secure Core” servers
- Has an audited no-logs policy, and an open-source (and audited) Windows app
- Works with over 90 streaming sites, and has P2P servers in over 110 countries
What We Don’t Like
- Has a free plan with unlimited data, but it doesn’t allow streaming or torrenting
- Its long-term prices are a bit steep compared to competitors
- Has a 30-day money-back guarantee, but it’s prorated
Windows App User Experience
Proton VPN’s Windows app works on Windows 11 and 10 — we also confirmed with the VPN’s support reps that it works on Windows 7 and 8. Proton VPN also has a special ARM version of its Windows app that works with ARM devices, such as Lenovo Flex 5G, Surface Pro, and HP Elite Folio.
We tried out the Windows 11 and 10 apps, and we found them very user-friendly. The interface is simple to navigate, and there’s a digital server map for quick access to different server locations (just like you get with NordVPN).
FYI: Unlike Surfshark, Proton VPN’s Windows app isn’t available on the Microsoft Store. Check out our Surfshark vs. Proton VPN comparison to see how else the VPNs differ.
Server Network, Streaming & Torrenting
Proton VPN has servers in 117 countries, which is one of the largest server networks in 2026 (and also on par with NordVPN). Its huge server network allows the VPN to maintain very fast speeds — our most recent tests from June 2026 show that Proton VPN reduces overall speeds by no more than eight percent.
The VPN also works with over 90 streaming platforms, including Netflix, BBC iPlayer, Amazon Prime Video, and Disney+. It’s also compatible with over 20 Netflix libraries — in our tests, it worked with Netflix US, UK, and Japan without issues.
Proton VPN also has P2P servers in over 110 countries, and has built-in support for port forwarding on Windows. This connects you to more peers, improving P2P speeds — we tested it, and saw a ten percent increase in performance.
>> Related Reading: Proton VPN vs. NordVPN
Extra Features

Proton VPN’s Windows app lets you automate VPN connections via the Profiles feature. Proton VPN’s Windows app is really feature-rich. For one, it supports split-tunneling and obfuscation. The latter is available via its proprietary Stealth protocol.
The VPN also has “NetShield,” a tool that blocks ads, trackers, and malicious websites. In our tests, it blocked over 90 percent of ads. We also tried accessing five unsafe HTTP websites, and it stopped us every time.
Feature Highlight: The Windows app has “Profiles,” a tool for automating VPN connections. We used it to set up a profile that auto-connects to the fastest UK server, and opens Netflix in our default browser.
Pricing
Proton VPN offers two paid tiers: “VPN Plus” and “Proton Unlimited.” “VPN Plus” includes all core VPN features, whereas “Proton Unlimited” adds additional privacy tools, like Proton Pass and Proton Mail.
“VPN Plus” “Proton Unlimited” 1-Month $9.99/month $12.99/month 1-Year $4.99/month $9.99/month 2-Years $4.49/month $7.99/month All Proton VPN plans also come with a 30-day money-back guarantee. However, it’s a prorated refund — this means it only covers the unused portion of your subscription. So, if you cancel after 16 days, you’re only refunded for the remaining 14 days.
Free Version: Proton VPN has a free VPN plan with unlimited data, so it’s perfect for testing the VPN’s Windows app risk-free. However, the free version doesn’t allow streaming or torrenting, and only has servers in five countries.
-
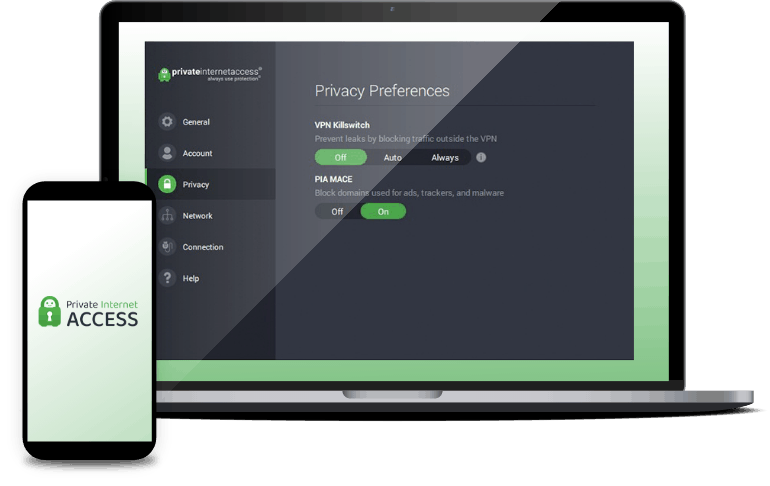
4. Private Internet Access - Best for Torrenting on Windows
 View Plans Links to Private Internet Access
Product Specs
Server locations 91 countries Average Speed Loss 5% download & 84% download Apps Windows, MacOS, Linux, Android, iOS, Chrome, Firefox, Android TV, tvOS Best Monthly Rate $1.98/mo with a 3-year plan Money-Back Guarantee 30 days full refund
Who Private Internet Access Is Good for
We really like how Private Internet Access has extra P2P features that boost download speeds on Windows, like SOCKS5 proxy support. We recommend Private Internet Access (PIA) to Windows users who are focused on torrenting. The VPN’s P2P support is very good, and you get access to additional P2P features on Windows that could boost torrenting speeds.
What We Like
- Allows torrenting on servers in 91 countries
- Provides SOCKS5 and port forwarding support on Windows
- Has very strong privacy features
- Allows unlimited simultaneous connections
What We Don’t Like
- Manual setup might be required to access the web in restrictive countries
- The ad blocker sometimes struggles with pop-up ads
- The Windows app isn’t as feature-rich as NordVPN or Surfshark’s apps
Windows App User Experience

We were able to configure the Windows app to automatically connect to a VPN server, depending on what kind of network we used. You can download and use Private Internet Access’ app on Windows 10 and 11, and even on Copilot+ devices (just keep in mind this app version is still in beta). Plus, the VPN supports unlimited simultaneous connection, just like Surfshark does. We were also able to download the PIA VPN app on older Windows 7 and 8 laptops, but only an older version of the app that the company no longer provides technical support for.
We spent a whole week testing PIA’s Windows app, and we can confidently say that it’s very user-friendly. It never took us more than a few seconds to find and connect to a VPN server or enable different features or settings.
Pro Tip: PIA’s Windows app also provides connection automation options for Wi-Fi and wired networks. For example, we configured the VPN app to automatically connect to a server whenever we connect to a public Wi-Fi network.
Server Network, Streaming & Torrenting
PIA has servers in 91 countries. While the server network is slightly smaller than what you get with NordVPN, Surfshark, and Proton VPN, it should still be enough for almost all users. Plus, we saw that the servers are evenly spread across almost all continents, so we think it would be easy for anyone to find and connect to a nearby server for fast speeds.
And while the VPN’s streaming support isn’t the highlight, it’s still pretty good. PIA guaranteed support for over 40 streaming platforms, including popular ones like Netflix, ESPN+, Max, and Amazon Prime Video.
But where PIA really shines is the torrenting support. In addition to allowing torrenting on all servers, it provides support for SOCKS5 proxy connections and port forwarding. Port forwarding lets you connect to more peers to get faster download speeds. It’s super easy to enable port forwarding in the Windows app — you just open the Settings menu, click the Network tab on the left, and check the box next to “Request Port Forwarding.”
>> Read More: The Best VPNs for Torrenting in 2026
Extra Features
While PIA’s Windows app isn’t as feature-rich as that of NordVPN and Surfshark, it still provides access to useful extras. For one, you get split-tunneling, and we like how, on top of letting your split-tunnel app traffic, it also lets you exclude websites from the VPN connection. For example, we set up PIA to only route qBittorrent traffic through the VPN and exclude Netflix’s site from the connection. That way, we were able to securely download torrents while watching a movie on Netflix to pass the time.
The Windows app also provides access to MACE, which is PIA’s ad blocker. We used it while browsing ad-heavy websites, and it was able to get rid of almost all ads. However, it did struggle a bit with some pop-up ads.
FYI: If you’re mainly interested in getting a VPN with an ad blocker, we recommend NordVPN instead of PIA. NordVPN’s Threat Protection Pro feature is better at blocking ads, and it also provides better overall security since it protects you from malware-infected downloads. Plus, you don’t even have to be connected to the VPN for Threat Protection Pro to remain active.
Pricing
PIA is one of the best cheap VPNs in 2026. If you opt for the longest plan, you’ll only pay $2.19 per month. Plus, the longest plan often includes extra months of service for free. And we also like how the VPN backs all of its plans with a 30-day money-back guarantee.
Private Internet Access Pricing Plans 1-Month Plan $11.99/month 6-Month Plan $7.50/month 2-Year Plan $2.19/month >> Learn More: How Much Does Private Internet Access Cost?
-
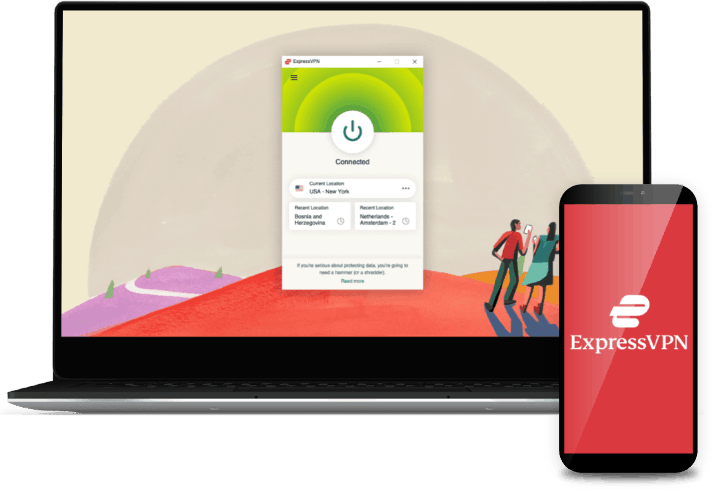
5. ExpressVPN - Great Windows VPN for Beginners
 Get ExpressVPN Links to ExpressVPN
Product Specs
Server locations 105 countries Average Speed Loss 7% download & 24% upload Apps Windows, MacOS, Linux, Android, iOS, Chrome, Firefox, Edge, Android TV, tvOS Best Monthly Rate $2.79/mo with a 2-year plan Money-Back Guarantee 30 days full refund
Who ExpressVPN Is Good for

We really like how ExpressVPN’s Windows app provides quick explanations for all settings and features. We think ExpressVPN is a great option for people who are new to VPNs. Its Windows app is really simple to install and set up — the whole process won’t take more than two minutes. Plus, the app is extremely user-friendly, even providing quick tutorials and explanations for settings and features.
What We Like
- Has a Windows app that’s very simple to navigate and use
- Provides very strong security and privacy
- Works with over 100 streaming services
- Has servers in 105 countries
What We Don’t Like
- A bit expensive compared to other top competitors
- Only allows eight simultaneous connections
- The Windows app isn’t very feature-rich
Windows App User Experience

We used the Shortcuts feature to get instant access to YouTube, a P2P app, and our browser after connecting to ExpressVPN. ExpressVPN’s app is available for Windows 10 and 11. You can also install it on a Copilot+ PC using the ARM64 version of the app (although, keep in mind, it’s still in beta). You can also get ExpressVPN’s Windows app from its site or the Microsoft Store. It’s also possible to use ExpressVPN on Windows 7 and 8. However, you’ll need to contact customer support and ask them to send you the installer.
We really like how intuitive ExpressVPN’s Windows app is. The interface is very straightforward, so it’s easy to find the VPN servers, as well as different settings and features. We also like the Shortcuts feature, which lets you set up one-click shortcuts for apps and sites that show up on your connection screen.
FYI: ExpressVPN allows eight simultaneous connections. We think it’s decent, but it might not be enough for a family. If you need to secure tons of Windows devices, we recommend getting Surfshark or Private Internet Access instead. Their Windows apps are also intuitive, and both VPNs allow unlimited connections.
Server Network, Streaming & Torrenting
When we used ExpressVPN’s Windows app, we counted servers in a total of 105 countries. The VPN also performed pretty well in our speed tests — our download speeds slowed by 7.57%, and our upload speeds only took a 24.12% hit. When we used ExpressVPN to watch HD videos on Netflix, they loaded instantly and didn’t buffer when we skipped through them. Three of our team members were also connected to ExpressVPN on a Zoom call, and they didn’t report any noticeable slowdowns.
The VPN’s streaming support is also really good. ExpressVPN claims to work with over 100 streaming services. We tested it with Netflix, Amazon Prime Video, RaiPlay, BBC iPlayer, and Disney+, and although some required a little trial-and-error, we were able to unblock all of those sites eventually.
ExpressVPN is also great for torrenting on Windows since it supports P2P traffic on all of its servers. That said, if your main focus is torrenting, we recommend Private Internet Access instead. It allows torrenting on all servers like ExpressVPN, but also supports SOCKS5 proxy connections and port forwarding.
Extra Features
The Windows app provides access to split-tunneling and Advanced Protection. The latter is basically an ad blocker. It performed well in our tests, but keep in mind it’s not as full-featured as NordVPN’s Threat Protection Pro tool — it can’t protect your device from malicious downloads, for example. Still, we like how Advanced Protection lets you block adult websites. It’s a basic level of parental controls, which could be useful for parents.
Also, each ExpressVPN subscription includes free access to ExpressVPN Keys, the VPN’s password manager. We tested ExpressVPN Keys to protect logins, securely log into accounts, and generate strong passwords. Just keep in mind that the password manager isn’t built into the ExpressVPN Windows app. Instead, you’ll need to install it on your Chrome browser.
FYI: We still think Nord’s NordPass password manager is better than ExpressVPN Keys. In our NordPass review, we mention how it future-proofed its password encryption with a modern encryption standard and how well it works with passwordless logins. It’s one of the best password managers overall in 2026.
Pricing
We think ExpressVPN is affordable, though its pricing is a bit steeper than its competitors. For reference, if you get the longest plan, the prices begin at $4.99 per month. On the plus side, the longest plan often includes extra months of service for free. And the VPN also has a 30-day money-back guarantee for all plans and a free 7-day trial.
ExpressVPN Pricing Plans 1-Month Plan $12.95/month 1-Year Plan $6.67/month 2-Year Plan $4.99/month >> Related: How Much Does ExpressVPN Cost?
-
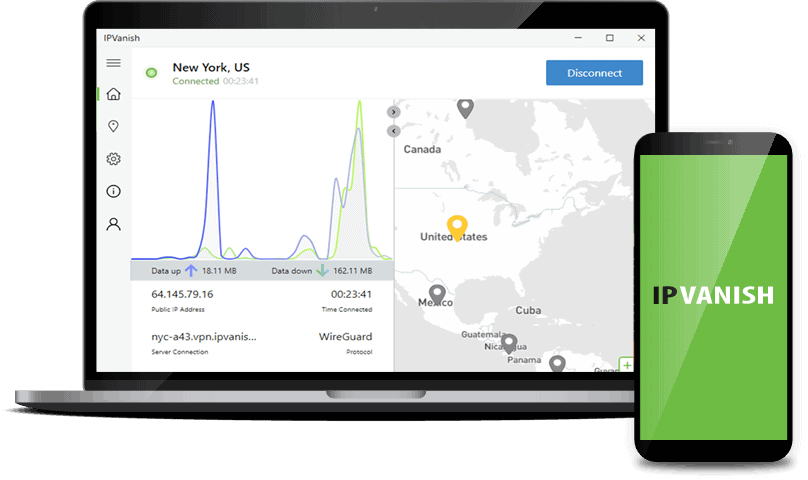
6. IPVanish - Good Windows VPN with Fast Speeds
 View Plans Links to IPVanish
Product Specs
Multihop Yes Obfuscated Servers Yes Kill Switch Yes Split Tunneling Yes Netflix Yes Torrenting Yes
Who IPVanish Is Good for
IPVanish provided us with very fast speeds, which we were further able to boost via its split-tunneling tool. IPVanish performed extremely well in our speed tests, so it’s a good fit if speed is the most important metric for you when choosing a VPN. IPVanish maintains such fast speeds thanks to its large server network and its use of fast VPN protocols.
What We Like
- Maintains very fast download and upload speeds
- Provides great P2P support for Windows users
- Has a pretty feature-rich Windows app
- Allows unlimited simultaneous connections
What We Don’t Like
- Sometimes has trouble accessing Netflix
- Might not be able to access the web in restrictive countries
- Only offers a 30-day money-back guarantee for its long-term plans
Windows App User Experience
IPVanish has a VPN app for Windows 10 and 11, as well as Windows ARM64 devices. You can also install IPVanish on Windows 7 and 8, but you’ll have to use an older version of the app and contact customer support to ask for the download link, just like with ExpressVPN. We also like how IPVanish joins the ranks of Surfshark and Private Internet Access, allowing unlimited simultaneous connections.
We installed and used IPVanish’s app on our Windows 10 and 11 PCs for this guide. Overall, we think the app makes it very easy to find and connect to different servers. It’s also really simple to navigate the app to find and enable different settings and features.
Server Network, Streaming & Torrenting
We went through IPVanish’s server list on its Windows app and we counted a total of 106 countries. We believe this makes it very easy to connect to nearby servers to get the fastest speeds. Windows users also get access to WireGuard and IKEv2/IPSec, which are really fast protocols. We ran multiple speed tests with both protocols over the course of a week, and the results were really good — we didn’t experience lag while playing our download, and our download and upload speeds decreased by less than 5%.
We also tested IPVanish’s streaming support and we generally had a great experience. We were able to use the VPN to access Netflix, Amazon Prime Video, Disney+, Max, and Crunchyroll. We did experience some issues when accessing Disney+, but it didn’t happen often.
And IPVanish is also great for torrenting. We like that it supports P2P traffic on all servers, and we were really happy to find that it also has several SOCKS5 proxy servers.
FYI: We used one of IPVanish’s SOCKS5 servers to download a 20 GB torrent, and the whole download process took just eight minutes. For comparison, when we downloaded the same torrent file with the VPN, we had to wait 12 minutes for the download to finish.
Extra Features
IPVanish’s Threat Protection stops ads from displaying on websites, which could make them load faster. We think IPVanish’s Windows app provides access to pretty good extra features. For one, you get access to split-tunneling, and we like how you can split-tunnel both apps and websites on Windows. There’s also the Threat Protection feature, which blocks ads, ad trackers, and malicious websites. While it more or less shares the same name as NordVPN’s Threat Protection Pro feature, it’s not as good since it can’t protect you from malware-infected downloads or vulnerable Windows apps.
Windows users also get access to double VPN connections, and we like how you can customize them by choosing an entry and exit server from all of IPVanish’s VPN servers. This feature basically works the same as Surfshark’s Dynamic MultiHop tool.
Pro Tip: If you want to use double VPN connections, keep in mind that they’ll be slower than regular VPN connections. That’s due to the extra layer of encryption and the additional distance added by the second VPN server. We ran speed tests while using a double VPN connection, and it was usually 15-20% slower than a regular VPN connection.
Pricing
IPVanish has two tier-based subscriptions: IPVanish Essential and IPVanish Advanced. For this guide, we signed up for IPVanish Essential. That’s the subscription we actually recommend since it comes with all VPN features. The IPVanish Advanced subscription is only worth it if you want phone support, a secure browser, and cloud backup. Also, the VPN has a 30-day money-back guarantee, but it only covers the long-term plans.
IPVanish Essential IPVanish Advanced 1-Month Plan $12.99/month $14.99/month 1-Year Plan $3.33/month $4.49/month 2-Year Plan $2.19/month $3.29/month >> Read More: How Much Does IPVanish Cost in 2026?


Our Testing Process: How We Ranked The Best VPN Services for Windows
How We Test VPNs
Choosing the right VPN means more than taking providers at their word about privacy or performance. Our evaluation process is designed to surface the difference between a VPN that delivers and one that just markets well. Every recommendation on this page is built on our Editorial Guidelines and backed by direct, hands-on testing.
Our reviewers sign up for and run each provider through a full battery of tests, kicking things off with a careful review of no-log policies. We also check which providers have independent third-party security audits. From there, we test connections. We check for all major leak types, deliberately cut connections to verify kill switch behavior, and run speed tests across dozens of server locations. We round out each evaluation by verifying unblocking performance on major streaming platforms. All these tests aim to gauge real-world performance. Lastly, we check and compare pricing for both long- and short-term subscriptions.
Our Evaluation Criteria
Windows is the world’s most widely used desktop operating system, and that ubiquity makes it one of the most frequently targeted platforms for the kind of surveillance, data harvesting, and network-level attacks a VPN is designed to defend against. We built our Windows-specific criteria around the threats and use cases that matter most to everyday Windows users. Here’s what shaped our scores:
- Windows App Quality and Native Performance: We assessed how well each VPN’s Windows client was built for the platform. We tested installation across Windows 10 and 11, evaluated interface responsiveness and feature accessibility, and checked whether the app ran efficiently in the background without creating the kind of CPU or memory overhead.
- Split Tunneling and Advanced Feature Depth: We tested each VPN’s split tunneling implementation on Windows, evaluating how granularly users could control which apps and traffic routes went through the VPN. We also tested other Windows-relevant features like per-app kill switches, protocol switching, and obfuscation options that give more technically inclined users greater control over their security.
- Security Protocol Support and Encryption Standards: We examined which tunneling protocols each provider supported on Windows — including WireGuard, OpenVPN, and IKEv2 — verifying that encryption standards met the AES-256 benchmark and that protocol options gave users the flexibility to prioritize speed or security depending on what their current use case demanded.
- Compatibility Across Windows Versions and Configurations: We tested each VPN across multiple Windows versions and hardware configurations, checking for installation conflicts, compatibility issues with Windows Defender and other built-in security tools, and whether automatic startup and reconnection behavior worked reliably.
Clearing these criteria on Windows specifically — not just on the platform each provider happens to test best on — was the standard every VPN on this list had to meet.
About Our Experts
Security.org’s independent team of security and privacy experts has long been committed to putting out only honest, unbiased recommendations that hold up under real-world scrutiny. Our 20+ researchers and hands-on testers have collectively spent over 25,000 hours on security product research since 2018, building a body of work spanning 740+ VPN and security reviews.
Our VPN testing, in particular, is headed by Brett Cruz, a cybersecurity expert and VPN specialist who has reviewed hundreds of VPN services and digital privacy tools. He uses a thorough, systematic testing process grounded in real-world use from signup to long-term evaluation. The wider team behind our VPN content includes:
- Gene Petrino: Retired S.W.A.T. commander and former law enforcement sergeant with three decades of real-world security expertise
- Corey Birnstengel: Editor and videographer behind 200+ hands-on video reviews
- Ozzie Enriquez: West Point graduate and former Deputy Director of Security at the Missile Defense Agency, U.S. Pentagon, contributing expertise in threat analysis
- Cort Honey: Engineer with 1,000+ hours of hands-on product testing and a specialty in translating complex security technology into clear, accessible guidance for everyday users
No security provider can pay to influence our rankings, and every recommendation on this page is completely independent.
Why Should You Use a VPN on Windows?
Here are the main reasons we recommend using a VPN:
- Protect your online privacy. VPNs hide your IP address on the internet. This prevents malicious actors from using it to determine your location. It will also stop ad trackers from associating your online preferences with your IP address.
- Secure your web traffic. When you use a VPN, it encrypts your internet traffic. This essentially means it makes it 100% unreadable, so nobody will be able to monitor what you do on the internet.
- Prevent bandwidth throttling. Your ISP might throttle your speeds during peak internet hours, especially if you engage in bandwidth-heavy activities like streaming or gaming. If you use a VPN, though, your ISP won’t be able to selectively slow down your speeds for specific online activities since they won’t be able to see what you’re doing online.
- Enjoy better streaming. VPNs allow you to access streaming sites and content that’s not available in your location. For example, we often use VPNs when we travel abroad to access Netflix libraries from our home countries.
- Hide your P2P activities. VPNs make your torrenting traffic unreadable so that your ISP can’t detect it. A VPN also protects your privacy when torrenting by stopping anyone in the torrent swarm (the people downloading and uploading a torrent) from seeing your real IP address.
- Improve your gaming experience. If you use a VPN to play online games, you might enjoy more stable ping — especially if you use a VPN server in the same country as the gaming server. VPNs also help you bypass unfair IP bans and protect you from DDoS attacks.
- Bypass firewalls. VPNs allow you to access blocked sites on restrictive networks, like at school, for example. Some VPNs even help you circumvent internet censorship in restrictive countries — like China and Russia, for instance.
How to Set Up a VPN on Windows 10 & 11
Setting up a VPN is really simple, no matter what platform you’re installing it on. On Windows, there are basically two ways:
1. Download the VPN App From the Microsoft Store

This is the more straightforward route — look up the VPN on the Microsoft Store and click the “Install” button. Just keep in mind that not all VPNs have apps on the Microsoft Store. Among our six top picks, we found that only Surfshark and ExpressVPN are available on the Microsoft Store.
2. Download the VPN App From the VPN’s Site

Another option is to download the VPN’s Windows app directly from its website. You should be able to download it either from your account dashboard or from the VPN’s dedicated Windows app web page. Just make sure you’re downloading the app from the official website. Don’t get it from third-party sites, as it could be a malicious file that infects and compromises your system.
After you download the Windows app installer, run it and follow the on-screen instructions to install and set up the app.
Do VPNs Work on Older Windows Versions?

Yes, most VPNs that work on Windows 10 and 11 will also work on Windows 7 and 8. For example, we confirmed that you can install and use all six VPNs on our list on Windows 7 and 8. We also reached out to other top VPNs (PrivateVPN, for example), and they confirmed that their apps work on Windows 7 and 8.
There are some drawbacks if you do that, though. You’ll often have to use an outdated version of the VPN’s Windows app. So, you might not have access to features that were introduced recently. Also, the VPN’s customer support team likely won’t be able to provide technical support if you experience any issues.
It’s also possible to use a VPN on Windows XP and Windows Vista, but you will more than likely have to perform a manual setup. For example, both NordVPN and Private Internet Access told us that their apps won’t work on Windows XP and Windows Vista, so you’ll need to use the VPN via a manual OpenVPN connection on those operating systems instead.
If you’re using an older version of Windows, however, the best thing to do for your cybersecurity is to upgrade to a newer version. This way, you won’t have to worry about operating system vulnerabilities putting your device at risk. At the moment, Windows 11 is the latest version. But it’s still safe to use Windows 10 for now, too, though keep in mind it will stop receiving security updates towards the end of 2025.

Common Windows VPN Problems and How to Fix Them
Even if you have an up-to-date version of Windows, though, you may still encounter problems while using a VPN. Unfortunately, these issues are common – more common in Windows VPN apps than macOS VPNs, iOS VPNs, or Android VPNs, in our experience.
Don’t fret; they are likely going to be easy to fix. Here are some of the most common VPN issues you might encounter and how to fix them.
Issue: Failed installation
Ways to fix:
- Restart your computer.
- Whitelist the VPN installer in your network’s firewall or antivirus software.
- Install the latest Windows update.
- Check if an older version of the app is already installed. Uninstall it.
- Check that you downloaded the right installer for your Windows version.
Issue: Not connecting
Ways to fix:
- Restart your PC and refresh your Wi-Fi or Ethernet connection (unplug, then replug).
- Whitelist the VPN app in your antivirus or network firewall.
- Update your PC’s network drivers.
- Check that your internet connection is working. If yes, try a different network.

Issue: Slow connection; connected but not loading any pages
Ways to fix:
- Disconnect and restart the VPN app.
- Try a different server (ideally a nearby location).
- Disconnect the VPN and test your internet speed. If no page is loading still, your internet connection might be the problem. Restart your router or contact your internet provider.
Issue: Websites still detecting your real location, IP address
Ways to fix:
- Clear your browser’s cache.
- Use a different browser, preferably in incognito/private mode.
- Disconnect the VPN and try again with a different server.
- If the issue happens often, try a different VPN.
Can You Use a Free VPN on Windows?
Yes, but we don’t really recommend doing this. Free VPNs often come with annoying limitations. For example, they could limit how much data you can use each day or month, limit your speeds, or restrict you to only a few server locations. Plus, many free VPNs don’t work with streaming sites or allow torrenting.
Also, some free VPNs have really buggy Windows apps — they crash often, experience connectivity issues, or certain features and settings don’t work. And other free services simply are not usable by regular internet users. For example, Radmin VPN is a free VPN for Windows, but it’s mostly geared towards office environments.
And some free VPNs could even put your privacy at risk. For example, they could log your personal and browsing data and sell it to advertisers. Or, they could use a peer-to-peer system, where other VPN users use your IP address to access the internet (like Hola does).
It’s better to just get an affordable premium VPN — either a VPN with a free trial or a service with a generous money-back guarantee (so that you can test the VPN risk-free). But if you still insist on using a free VPN, we recommend checking out our guide to the best free VPNs in 2026.
Is It Legal to Use a VPN on Windows?
Yes, it’s perfectly legal to use a VPN on Windows and any other operating system, really. Of course, it’s against the law (and the VPN’s terms of service) to use the VPN to engage in illegal activities, like torrenting copyrighted content, for example.
Also, keep in mind that some countries ban VPNs. Using a VPN in such a place could result in severe legal repercussions.
>> Read More: Is Using a VPN Legal?
Conclusion
Using a VPN on Windows is definitely worth it, though picking the right one can be difficult. We hope we managed to narrow down your choices to the top six VPN on our list. Our favorite one is NordVPN simply because it has a very feature-rich Windows app.
But the other VPNs we covered in this guide are also great options. Surfshark is great for streaming, whereas Proton VPN is excellent for privacy. Plus, Private Internet Access is really good for torrenting, ExpressVPN is a great pick for Windows users new to VPNs, and IPVanish is a good choice if you need very fast VPN speeds.
FAQs About Windows VPNs
-
How do I use a VPN on my PC?
You just need to download and install the VPN’s Windows app on your device. You get the app from the VPN’s site, though some services are also available via the Microsoft Store. Then, you install the app and follow the on-screen instructions to set it up. Finally, launch the VPN app and connect to a server.
-
What is the best free VPN for Windows?
We recommend getting Hotspot Shield. Its Windows app is extremely simple to use, and the free version provides unlimited data and fast speeds. Also, free users get access to split-tunneling on Windows.
-
Does Windows 10 have a built-in VPN?
Windows allows you to set up a manual VPN connection via its system settings. It supports multiple VPN protocols, including SSTP, IKEv2/IPSec, L2TP/IPSec, and PPTP. But you’ll still need to add the VPN server address. So, you’ll either need to set up your own server or sign up for a VPN provider and use one of its servers.
-
Should I use a VPN on my PC all the time?
It’s not necessary to keep the VPN turned on 24/7. We mainly recommend using it when you access sensitive information over the web, when you want to protect your privacy while browsing the internet, when you want to unblock streaming content, or when you want to hide your P2P traffic. That said, if you suspect that your ISP is throttling your bandwidth, you may need to turn on the VPN whenever you’re online.