

the security.brief
Nintendo Switch can't use VPNs directly, but connect it via a VPN-enabled router or virtual router on your computer for secure, unrestricted gaming and streaming.
We’re seeing a resurgence of handheld gaming devices thanks in part to the Nintendo Switch. It offers the same convenience of on-the-go gaming as its ancestors – from the Game Boy to the Nintendo DS – while adding a bunch of new features. One of those new features? Internet connectivity.
That’s great, because it lets you play online multiplayers and use video streaming apps like Hulu and YouTube. But internet connectivity comes with a lot of privacy risks. That’s why we always recommend using a VPN on any device you connect online.
FYI: Hulu is one of the few streaming platforms to make it to the Nintendo Switch. See our list of the best Hulu VPNs to learn which VPN you should use to access all Hulu movies and shows not available in the U.S.

The bad news is, Nintendo Switch doesn’t support VPNs natively. You can’t install a VPN, and you can’t download a VPN app.
The good news is, we know a couple of great ways to get around this limitation. Read on, and in no time you’ll be playing more games and watching more videos than ever before.
>> Read About: How to Set Up Parental Controls on Nintendo Switch in 2026
How to Connect Your Nintendo Switch to a VPN
There are actually two ways to connect your Nintendo Switch to a VPN.
First, you can install a VPN on your router. The advantage of this method is that you won’t just be protecting your Nintendo Switch. Every device connected to your router will have full VPN protection.
Here’s how it works.
Using Your Router
- Select a VPN. You can find lots of great options on our list of the best VPNs, or check out our list of the best VPNs for gaming.
- Sign up for a subscription with your chosen VPN.
- Open an internet browser on your computer. Type in your router’s IP address to access the router’s settings.
- Reconfigure your router with information about your VPN. This process will be different depending on your specific router and your specific VPN. Some routers, for example, have a menu item for setting up VPNs. Others may require you to download firmware from your VPN provider.
- Turn on the Switch.
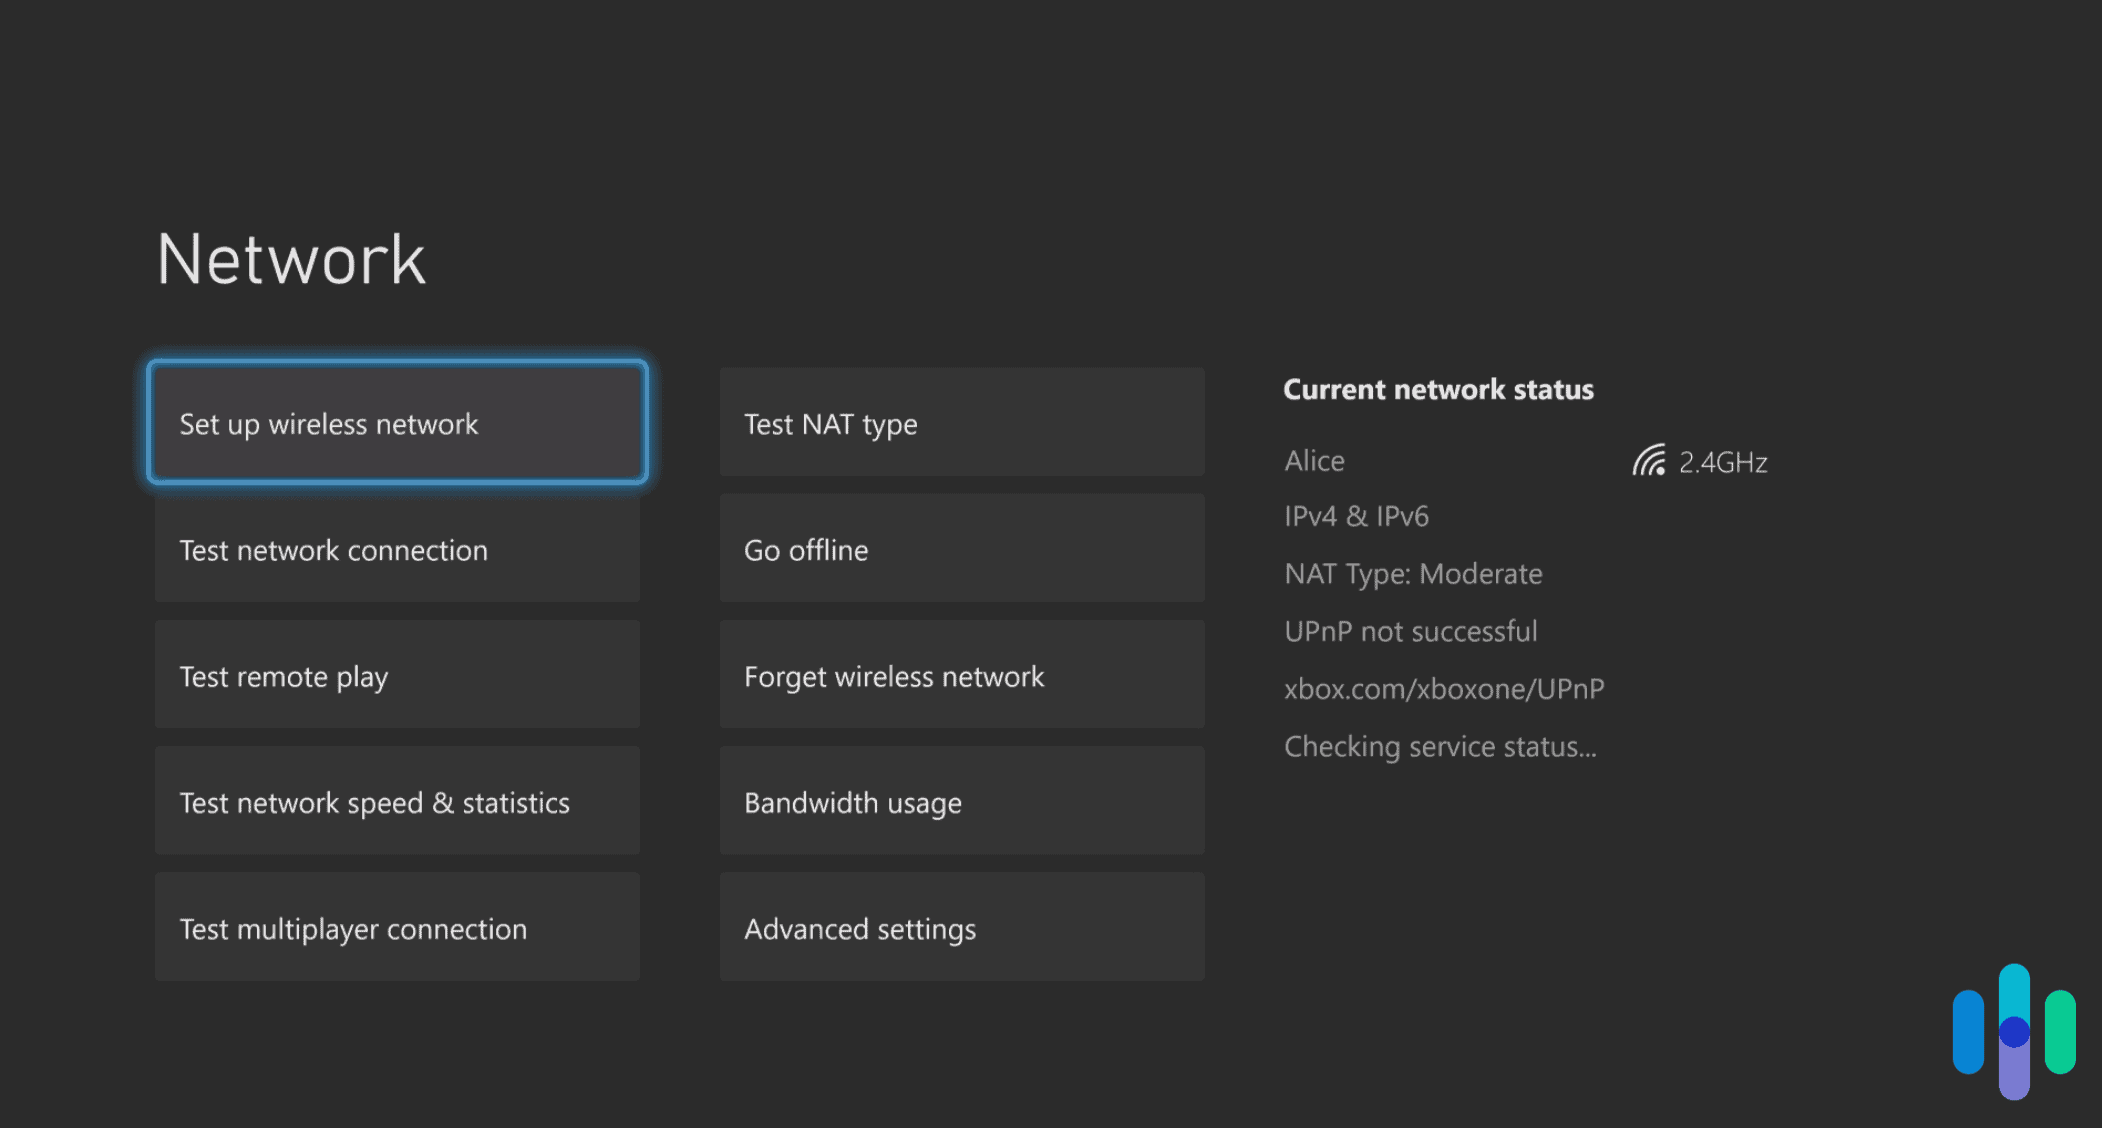
- Navigate to the Home menu and select the gear icon to access your System Settings.
- Choose Internet and then Internet Settings.

Once you’re finished, all your devices will be covered, including your Nintendo Switch. If you have a new Nintendo Switch, though, you’ll want to make sure it’s connected to your router. Let’s continue with that numbered list above…
- Your Nintendo Switch should automatically search for available networks. Choose your network.
- If your network requires a password, you’ll need to enter it.
- Press OK.
Connecting your Nintendo Switch has several downsides, though. For one, you can’t switch servers easily. Unlike with a VPN app where you can easily and conveniently choose a different location to connect to, a VPN configuration set up on a router allows only one server location at a time. You need to set up a new configuration every time you want to access a different server.
Another downside is that you can only protect your Nintendo Switch that way if you’re within the router’s Wi-Fi coverage – i.e. at home. You can’t take advantage of the Nintendo Switch’s great on-the-go gaming capabilities if you’re tied to your home network.

Using Your Windows Device as a Virtual Router
Another useful option is to use your PC or laptop as a hotspot and route your Switch through that hotspot. Basically, your hotspot device becomes a virtual router. Because you’re using a computer though, instead of your router, you’ll be able to pull up your VPN app and make adjustments anytime you need to.
Here’s how to do it.
- Choose a VPN. You might want to consider one of our best VPNs for Windows devices.
- Sign up for a subscription to the VPN.
- Download the VPN onto your computer and install the software.
- Log in to the VPN and choose a server.
- Once you’re connected to the VPN, navigate to Settings and Network Connections.
- Select Mobile Hotspot and toggle the switch to On. For even more safety, click on the Edit button. Then, give your hotspot a name and a password so no one else can access it.
- Click on Ethernet and select Change Adapter Options.
- You should see your VPN listed. Right-click on it and choose the Properties tab.
- In the Properties tab, choose Allow Other Network Users to Connect.
- In the list of Network Connections choose your Wi-Fi hotspot.
Once you’ve connected your computer to a VPN and turned your computer into a hotspot, all you need to do is direct your Nintendo Switch to connect to that hotspot.

It’s also possible to turn your Windows device into a virtual router using an Ethernet cord. Here’s how to do that:
- Connect your Switch to your computer using your Ethernet cord.
- Follow instructions one through five above.
- Instead of selecting Hotspot under Advanced Network Settings, choose Adapter Settings.
- Right-click on your VPN’s icon and choose Edit.
- Click on the Sharing tab and select Allow Other Network Users to Connect Through This Computer’s Internet Connection.
- In the Home Networking Connection drop-down menu, choose Ethernet.
- Click OK.

Using Your Mac Device as a Virtual Router
You can turn your Mac into a virtual router as well. You’ll need your Ethernet cord for sure this time, though, since you can’t send and receive from a hotspot at the same time on Macs.
- Choose a VPN.
- Subscribe to the VPN and install the software on your computer.
- Choose a server and log in.
- Connect one end of your Ethernet cord to your computer.
- On your Mac, navigate to System Settings.
- In the Search box, type ‘Sharing’.
- Click the lowercase ‘i’ for ‘Internet Sharing’.
- Click the ‘Internet Sharing’ to On.
- Next, under Share Your Connection choose Wi-Fi.
- In the ‘To devices using’, make sure you toggle on the device you are connecting to.
- Launch your VPN’s app and connect to the server you want.
- Plug the other end of your Ethernet cord into your PlayStation’s Ethernet port.
- Turn on the Switch.
- Navigate to the Home menu.
- Choose Internet and then Internet Settings.
- Your Switch should automatically search for available networks. Choose your computer as the network.
- If your network requires a password, you’ll need to enter it.
- Press OK.

You can also use this method in reverse. That is, you can connect your computer to your router with the Ethernet cord and your computer to the Switch via Wi-Fi. To do this, simply reverse your choices in steps eight and nine.
The downside of using a virtual router setup is that you’d be hauling your laptop with you every time you want to connect your Nintendo Switch to a VPN. But at least you can use it on-the-go, unlike a VPN router. That said, expect slower speeds when connecting to a laptop working as a virtual router.
» Read about: Using a VPN on the PS5
Choosing the Right VPN for Your Nintendo Switch
Choosing the right VPN can be tricky. Obviously, you want one that can get you around geo-restrictions so you can access content that’s only available in certain locations. Beyond that, you’ll want to consider factors such as security, features, speed, price, and customer service. For a more detailed list of what to look for, you can consult our complete guide to VPNs. Alternatively, you could simply take a look at some of our thoroughly researched best lists, such as our list of the best VPNs for streaming, our list of the best VPNs for online gaming, or our list of the best free VPNs.

Why Use a VPN With Nintendo Switch?
We’ve already discussed how a VPN can enable you to get more gaming and streaming content on your Nintendo Switch. There are other compelling reasons to use a VPN, though.
- Security: The most important reason to use a VPN is because it protects you, particularly if you’re using public Wi-Fi. A VPN protects all your data by sending your internet connection through an encrypted tunnel. That means hackers and spies have no chance to steal your identity.
- Privacy: We know you’ve got nothing to hide. That doesn’t mean, though, that you want someone looking over your shoulder while you’re online. Your internet provider, for example, can see your browsing activity and history. You’re also at risk of getting hacked when your browsing data is exposed. And of course, the government might be watching your every move. VPNs encrypt your traffic so that none of those can track you.
- Throttling: Another great feature of VPNs is that they prevent your ISP from throttling your internet connection. Many internet providers use this to control how much bandwidth a user uses, or to penalize activities they frown upon such as torrenting. And the way it works is that they throttle the speed of certain IP addresses. Since VPNs keep your IP address anonymous, you might be able to circumvent such throttling practices.
- Gaming Speeds: The key to a great gaming experience is low latency. The faster your ping rate, the smoother your gameplay. When compared to ISPs, VPNs use a more direct route for transmitting data packets. That means less latency.
Pro Tip: When looking for a VPN, always check the privacy policy. Make sure the company doesn’t store any data relating to customer usage, like browsing histories, IP addresses, or time stamps.
Recap
The bottom line: It would be much simpler to stay protected and access more content if Nintendo just offered some VPN apps you could download with the touch of a button. It doesn’t look like that’s likely to happen any time soon. In the meantime, the guides on this page offer a few convenient workarounds.

So if you have a Nintendo Switch, you should definitely look into running a VPN so that you can access more content like Hulu and YouTube TV, games, and much more.
» Multiple consoles: VPN installation on the Xbox
FAQs
We’ve got even more answers to your questions about how to install a VPN on your Nintendo Switch. Just keep reading.
-
Can you put a VPN on a Nintendo Switch?
Technically, you cannot put a VPN on a Nintendo Switch. Nintendo Switch does not natively support this technology, and it doesn’t offer any VPN apps. However, you can still connect your Nintendo Switch to a VPN. One way to do this is by installing the VPN on your router and then connecting the Switch to the router. Another option is to turn your computer into a virtual router and connecting the Switch to it.
-
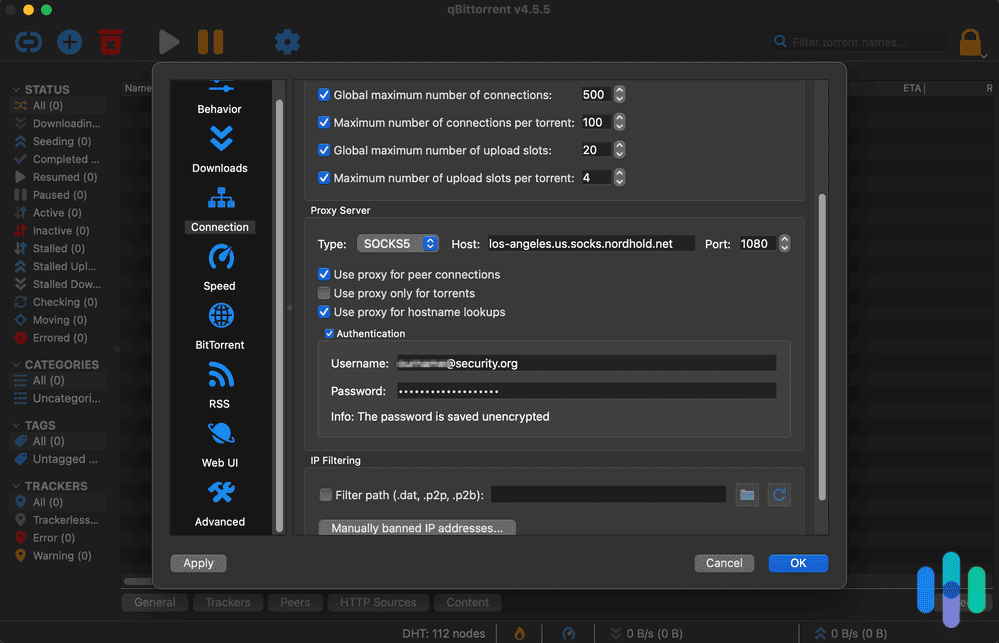
How do you use a proxy on a Nintendo Switch?
To use a proxy on Nintendo Switch, simply follow these instructions.
- Start your Nintendo Switch.
- Navigate to Settings.
- Scroll down and select Proxy Settings.
- Click Use a Proxy.
- Enter the information supplied by your proxy provider.
- Click Confirm.
-
Can you browse the internet on a Nintendo Switch?
You can browse the internet with the Nintendo Switch, but there’s a trick involved. The Switch doesn’t provide an internet app, so you can’t browse directly. However, there is a hidden browser you can access if you know how.
- From your Switch dashboard, navigate to System Settings.
- Choose Internet.
- Choose Internet Settings.
- Select the Wi-Fi you’re using.
- On the Settings page for that connection, choose Change Settings.
- Scroll down and select DNS Settings.
- Choose Primary DNS and set it as 045.055.142.122. Save.
- You should receive verification that the Switch has saved your settings.
- On the previous screen, you should now have a Connect to this Network choice. Click it.
- The next prompt should say Registration is Required to Use this Network. Click Next.
- Next, you’ll see a SwitchBru DNS page. Select Continue to Google.
-
Will the Nintendo Switch get Netflix?
The Nintendo Switch does not provide access to Netflix. It does have apps, however, for other streaming services, including Hulu and YouTube.